How to Make Cold Process Soap (Step by Step)
GrannyHobby is reader supported. We may earn a commission from purchases made through links on this page, at no extra cost to you. Learn more about the craft from Nurture Handmade.
What You Will Make
Cold process soap is handmade soap made from scratch using lye (sodium hydroxide), water, and natural oils. Unlike melt and pour soap (which uses a pre-made base), cold process lets you control every ingredient. You get a bar that is gentle, moisturizing, and exactly what you want it to be.
One batch takes about 45 minutes of active work, then 4 to 6 weeks of curing. The result is a bar of soap that costs a fraction of store bought artisan soap. If you can follow a recipe and use a kitchen scale, you can make cold process soap.
The basic ratio is simple: oils + water + lye = soap + glycerin. The lye and water create a chemical reaction called saponification that turns oils into soap. By the time the bar is cured, no lye remains.
What You Need
Tools and Equipment
You do not need a dedicated soap studio. Most of these tools live in a normal kitchen. The one exception: dedicate your stick blender and bowls to soap making, since lye should not contact food surfaces.
| Item | Best Pick for Beginners | Price | Why It Works |
|---|---|---|---|
| Complete Tool Kit | HSHIN Cold Process Soap Making Tool Kit | $79.99 | Includes scale, thermometer, stick blender, silicone molds, soap cutter, safety goggles, gloves, 20 kraft soap boxes. Everything but the ingredients. |
| Stick Blender | OVENTE Immersion Hand Blender | $14.99 | 300W, two speeds, stainless steel shaft. Affordable and gets the job done. |
| Digital Scale | Bonvoisin Baking Scale | $29.90 | 0.1g accuracy, 10 lb capacity, percentage weighing. Essential for precise lye and oil measurements. |
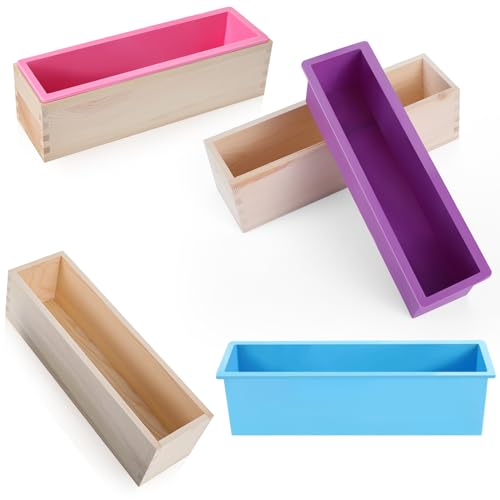
| Silicone Loaf Mold | Ziliny 3 Pack 42oz Silicone Soap Molds | $26.99 | Flexible silicone with wooden support boxes. Easy release, no liner needed. |
| Safety Goggles | TICONN Anti-Fog Safety Goggles | $8.99 | ANSI Z87.1 rated, anti-fog. Protects your eyes from lye splashes. |
| Gloves | Nitrile Gloves, 100 Count | $17.99 | Powder free, durable. Latex free for those with allergies. |
You will also need two or three stainless steel or heat safe glass bowls (no aluminum, it reacts with lye), a long handled stainless steel spoon or silicone spatula, an infrared or candy thermometer, and measuring cups for liquids. Most of these you may already have in your kitchen.

Ingredients
For your first batch, use a simple recipe with three oils. This is sometimes called a “master batch” recipe and is widely shared in the soap making community.
- Lye (Sodium Hydroxide): Essential Depot Food Grade Lye ($44.97 for 10 lbs). Food grade is important. A 10 lb container will last dozens of batches and stores well if kept dry and sealed.
- Olive Oil: Standard grocery store olive oil works fine. Avoid extra virgin if you want a lighter colored bar; pure olive oil is better.
- Coconut Oil: Solid at room temperature. Adds hardness and lather. Refined or virgin both work.
- Palm Oil or Shea Butter: Adds hardness and a creamy lather. If you prefer not to use palm oil, shea butter or lard are excellent substitutes.
- Distilled Water: Tap water contains minerals that can affect saponification and cause discoloration. Use distilled water for consistent results.
- Optional: Essential oils for fragrance, natural colorants (clay, spirulina, turmeric, cocoa powder), dried herbs or oatmeal for texture.
Based on buyer reviews, the HSHIN kit combined with Essential Depot lye and grocery store oils is the most common starting point for new soap makers. The kit includes tools and safety gear, the lye is food grade, and the oils are easy to source locally.
Step by Step Instructions
Step 1: Prepare Your Workspace and Safety Gear
Put on your goggles and gloves. Open a window or turn on a vent fan. Cover your work surface with newspaper or a silicone mat. Keep a bottle of white vinegar nearby to neutralize any lye spills. Measure out all ingredients before you begin.
Soap Lye (NaOH) & Water Calculator
Enter up to 5 oils and their weights. This calculates the sodium hydroxide (lye) and water needed for cold-process soap, using published saponification (SAP) values per oil.
Open the full lye & water calculator →
⚠ Lye (sodium hydroxide) is caustic. Always wear gloves and eye protection, add lye to water (never water to lye), and work in a ventilated area. This calculator estimates quantities only – it does not replace proper safety training.
Why a range of SAP values? Saponification values vary slightly by oil batch, crop, and processing method. The values used here are commonly-cited midpoints from published SAP tables – for a specific bottle of oil, check the supplier's own SAP value if provided.
Shop Sodium Hydroxide on Amazon(paid link) As an Amazon Associate we earn from qualifying purchases.
Step 2: Make the Lye Solution
In a well ventilated area, weigh your distilled water into a heat safe glass pitcher. Then weigh your lye beads into a separate container. Slowly pour the lye into the water while stirring gently. Never pour water into lye the mixture will erupt and splatter. The solution will heat up to around 180 degrees F and release fumes. Set it aside in a safe place to cool to 100 to 110 degrees F.
Step 3: Melt and Measure Your Oils
Weigh your solid oils (coconut oil, palm oil or shea butter) into a stainless steel pot. Heat them gently on low until fully melted. Remove from heat and add your liquid oils (olive oil). Stir to combine. Let the oils cool to about 100 to 110 degrees F.

Step 4: Check Temperatures
The lye solution and the oils should both be between 95 and 110 degrees F and within 10 degrees of each other. Cold process soap does not require exact temperature matching, but keeping them close helps prevent separation or a rushed trace.
Step 5: Combine Lye and Oils (Mix to Trace)
Slowly pour the lye solution into the pot of oils. Use your stick blender to mix. Start with short pulses to avoid splashing, then blend continuously. You are looking for “trace” the point where the batter thickens enough that a drizzle leaves a visible line on the surface. This takes 30 seconds to a few minutes depending on your oil blend and temperatures.
Step 6: Add Color and Fragrance
At thin trace, add your essential oils and colorants. Stir with a spoon or whisk until evenly distributed. If you want a swirl effect, reserve a small portion of uncolored batter and pour them in layers.
Step 7: Pour Into the Mold
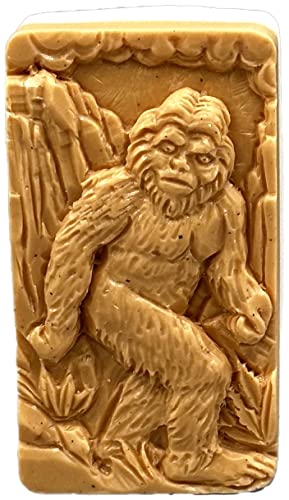
Pour the soap batter into your silicone loaf mold. Tap the mold gently on the counter to release air bubbles. Smooth the top with a spatula.

Step 8: Insulate and Wait (Saponification)
Cover the mold with a piece of cardboard or plastic wrap, then wrap it in a towel. This traps the heat the soap generates as it saponifies. Leave it undisturbed for 24 to 48 hours. During this time, the chemical reaction turns the oils into soap.
Step 9: Unmold and Cut
After 24 to 48 hours, the soap will be firm like cheddar cheese. If it is still soft or warm, wait another 12 to 24 hours. Unmold by pulling the silicone liner away from the soap. Use a sharp knife or soap cutter to slice the loaf into bars about 1 inch thick.
Step 10: Cure the Bars
Place the cut bars on a drying rack or parchment paper in a cool, dry place with good airflow. Turn them every few days. Allow them to cure for 4 to 6 weeks. During curing, water evaporates and the bar becomes harder, milder, and longer lasting. A properly cured cold process bar can last 3 to 4 times longer than a commercial bar.
Tips for Best Results
- Run your recipe through a lye calculator before you start. Soapcalc.net and the Bramble Berry lye calculator are both free and widely used. Enter your oils and desired superfat (5% is standard) to get the exact lye and water amounts.
- Use a spreadsheet or notebook to record every batch. Note the date, recipe, temperatures, trace time, and any additives. This is how you learn what works.
- Stick blend in short bursts. Over blending can cause the batter to thicken too fast, making it hard to pour or swirl.
- Soap batter that gets too thick can go into a “mold as log” or individual silicone cavity molds instead of a loaf mold.
- Let bars cure the full 4 weeks minimum. Soap that is used too early dissolves faster and can be harsh on skin.
- Test the pH of a cured bar with a pH test strip. A safe bar reads between 8 and 10.
Common Mistakes and What NOT to Do
Safety First
- Never pour water into lye. Always add lye to water. Adding water to lye causes a violent eruption of caustic solution.
- Never use aluminum utensils or bowls. Lye reacts with aluminum, producing hydrogen gas. Use stainless steel, heat safe glass, or silicone only.
- Always wear goggles and gloves when handling lye or fresh soap batter. Even experienced soap makers respect lye. A splash in the eye can cause permanent damage.
- Keep vinegar nearby. Vinegar neutralizes lye on skin. If you get batter on your skin, wipe it off and rinse with vinegar, then wash with soap and water.
- Keep children and pets out of the room during soap making. Uncured soap batter and lye solution are dangerous.
Process Mistakes
- Using the wrong oil ratios. Too much coconut oil (over 25% of total oils) makes soap that is drying. Too much soft oil (olive oil over 40%) makes a bar that stays soft for weeks. Stick to a balanced recipe.
- Adding fragrance oils not rated for cold process soap. Many fragrance oils cause the batter to seize or separate. Look for fragrance oils specifically labeled for cold process soap making.
- Skipping the lye calculator. Guessing lye amounts is dangerous and will not make usable soap. Always calculate.
- Cutting too early or too late. Cut at 24 to 48 hours. If you wait too long (over 4 days), the soap becomes hard and brittle and can crumble when cut.
How to Level Up
Once you have made two or three successful batches, try these next steps.
- Experiment with swirl techniques. The Ymapinc Soap Hanger Swirl Tools ($5.59) let you create patterns by dragging a bent wire through layered batter. Watch videos of the “hanger swirl” technique on YouTube.
- Try new oil blends. Replace some olive oil with avocado oil, sweet almond oil, or castor oil. Each oil adds different properties to the bar.
- Use natural colorants. Matcha powder gives a soft green. Kaolin clay creates a creamy white. Activated charcoal makes black or gray soap. Spirulina and turmeric are also popular choices.
- Make a soap recipe book. A dedicated soapmaking book with tested recipes will help you branch out into new oil blends, natural colorants, and advanced techniques.
- Join a soap making community. The soapmaking subreddit (r/soapmaking) and the Bramble Berry forums are active, beginner friendly spaces where you can ask questions and share results.

Frequently Asked Questions
Do I really need to wear goggles? Can I just be careful?
Yes, you really need to wear goggles. Lye solution is caustic and a single drop in your eye can cause permanent damage. Being careful is not enough. Wear safety goggles rated ANSI Z87.1 every time you handle lye or fresh soap batter, no exceptions.
How long does cold process soap last on the shelf?
A properly cured cold process bar lasts 12 to 18 months when stored in a cool, dry place away from direct sunlight. Some recipes with natural ingredients (milk, purees, fresh herbs) have a shorter shelf life of 6 to 9 months. You can extend shelf life by using antioxidants like rosemary oleoresin extract (ROE) in your oils.
Can I use a regular kitchen blender instead of a stick blender?
A regular countertop blender whips too much air into the batter and can over blend it to a thick paste before you are ready. A stick blender gives you controlled, gradual mixing. The OVENTE immersion blender at $14.99 is the most affordable option that soap makers consistently recommend.
Why did my soap separate into oily and watery layers?
Separation usually means the batter was not mixed to a stable trace before pouring. You may have stopped blending too early, or the temperatures of your lye solution and oils were too far apart. You can sometimes rescue separated batter by pouring it back into the pot and stick blending again until it reaches a thick trace. If it has already hardened in the mold, it is called “lye heavy” and is unsafe to use. Dispose of it safely.
Can I skip the curing time?
No. A fresh bar of cold process soap is still caustic from residual lye and too soft to use. The 4 to 6 week cure allows excess water to evaporate and the saponification reaction to complete. Using soap before it cures causes it to dissolve rapidly in the shower and can irritate your skin. Plan ahead and make soap before you run out.
Do I really need to wear goggles when making cold process soap?
Yes. Lye solution is caustic and a single drop in your eye can cause permanent damage. Wear safety goggles rated ANSI Z87.1 every time you handle lye or fresh soap batter, no exceptions.

Can I use a regular kitchen blender instead of a stick blender for cold process soap?
A countertop blender whips too much air into the batter and can over blend it before you are ready. A stick blender gives controlled gradual mixing. A basic immersion blender like the OVENTE at $14.99 is the recommended starting tool.
Why did my cold process soap separate into oily and watery layers?
Separation usually means the batter was not mixed to a stable trace before pouring. You may have stopped blending too early or the temperatures of your lye solution and oils were too far apart. If the soap has already hardened in the mold it is called lye heavy and is unsafe to use.
Can I skip the curing time for cold process soap?
No. The 4 to 6 week cure allows excess water to evaporate and the saponification reaction to complete. Using uncured soap causes it to dissolve rapidly in the shower and may irritate your skin. Plan ahead.
These statements have not been evaluated by the Food and Drug Administration. This information is not intended to diagnose, treat, cure, or prevent any disease. Content is for informational purposes only and is not medical advice; consult a qualified healthcare provider before starting any supplement. As an Amazon Associate we earn from qualifying purchases.
