If you want to know about how to crochet a hat, this guide covers everything you need. A crocheted hat is one of the most satisfying beginner projects you can make. It’s small enough to finish in an evening or two, useful enough that you’ll actually wear it, and impressive enough that people will ask “you made that?” The basic crochet beanie uses skills you may already have: working in the round, single or double crochet, and simple shaping through increases. If you can make a flat circle, you can make a hat.
This guide gives you a complete beginner beanie pattern with step-by-step instructions, a size chart for all ages, and tips for getting a perfect fit. No prior hat-making experience required.
How a Crochet Hat Works: How To Crochet A Hat
A basic beanie is constructed in two phases:
- The crown: You start at the top center with a magic ring and work outward in rounds, increasing evenly until the flat circle matches the diameter needed for your head size.
- The body: Once the crown is the right diameter, you stop increasing and work straight rounds (no increases, no decreases) until the hat reaches the correct length.
That’s it. A flat circle that becomes a tube. The increases create the crown, and the straight rounds create the sides that cover your head. Understanding this simple architecture means you can eventually design your own hats in any stitch pattern.
Hat Size Chart
Getting the right size is the most important part of hat-making. Here are the standard measurements, based on guidelines from the Craft Yarn Council.
| Size | Head Circumference | Crown Diameter | Hat Length |
|---|---|---|---|
| Preemie | 12″ | 3.75″ | 4.5″ |
| Newborn (0-3 mo) | 14″ | 4.5″ | 5.5″ |
| Baby (3-6 mo) | 16″ | 5″ | 6″ |
| Baby (6-12 mo) | 17″ | 5.5″ | 6.5″ |
| Toddler (1-3 yr) | 18″ | 5.75″ | 7″ |
| Child (3-10 yr) | 20″ | 6.25″ | 7.5″ |
| Teen/Small Adult | 21″ | 6.75″ | 8″ |
| Average Adult | 22″ | 7″ | 8.5″ |
| Large Adult | 23″ | 7.25″ | 9″ |
Crown diameter is measured flat across your circle before you start the straight rounds. Hat length is measured from the center top of the crown to the bottom edge. For a slouchy hat, add 1 to 2 inches to the hat length.
What You’ll Need
- Yarn: Worsted-weight yarn (category 4), approximately 150 to 200 yards for an adult hat. Acrylic or wool blend work well.
- Hook: 5.0mm (H/8) for a standard fit. If your hat is too loose, go down to 4.5mm. If too tight, go up to 5.5mm.
- Stitch marker: Essential for tracking round beginnings.
- Yarn needle: For weaving in ends.
- Scissors
- Measuring tape: To check your crown diameter and hat length.
Gauge
14 hdc and 10 rounds = 4 inches in half double crochet, worked in the round. If your gauge is off, adjust your hook size. A tighter gauge (more stitches per inch) means a smaller hat. A looser gauge means a larger hat.
Making a gauge swatch for a hat is simple: just start the hat pattern. After round 4 or 5, measure your flat circle. If it matches the expected diameter from the size chart, your gauge is right. If not, frog and try a different hook size.
- Winds up to 10oz balls
- Adjustable swift included
- Heavy-duty clamp base
The Pattern: Simple Half Double Crochet Beanie
This pattern is written for an average adult size (22″ circumference). See the modification section below for other sizes.
The Crown
Round 1: Magic ring. Ch 2 (does not count as a stitch throughout). Work 8 hdc into the ring. Pull the ring tight. Place a stitch marker in the first hdc. (8 hdc)
Round 2: 2 hdc in each stitch around. (16 hdc) Mastering how to crochet a hat takes practice but delivers great results.
Round 3: *Hdc in next st, 2 hdc in next st.* Repeat * to * around. (24 hdc)
Round 4: *Hdc in next 2 sts, 2 hdc in next st.* Repeat * to * around. (32 hdc)
Round 5: *Hdc in next 3 sts, 2 hdc in next st.* Repeat * to * around. (40 hdc)
Round 6: *Hdc in next 4 sts, 2 hdc in next st.* Repeat * to * around. (48 hdc)
Round 7: *Hdc in next 5 sts, 2 hdc in next st.* Repeat * to * around. (56 hdc)
Round 8: *Hdc in next 6 sts, 2 hdc in next st.* Repeat * to * around. (64 hdc)
Round 9: *Hdc in next 7 sts, 2 hdc in next st.* Repeat * to * around. (72 hdc)
Stop and measure your flat circle. It should be approximately 7 inches across for an adult hat. If it’s close to 7 inches, proceed to the body. If it’s significantly smaller, add another increase round following the same pattern (hdc in next 8 sts, 2 hdc in next st, for 80 hdc).
The Body
Rounds 10 through 22 (approximately 13 straight rounds): Hdc in each stitch around. No increases. (72 hdc per round)
Continue working straight rounds until the hat measures approximately 8 to 8.5 inches from the center of the crown to the bottom edge. Try it on (or hold it up to your head) to check the length. The hat should cover your ears with a little room to spare.
The Brim (Optional)
For a clean finished edge, add 1 to 2 rounds of single crochet at the bottom: Understanding how to crochet a hat is key to a great craft hobby.
Round 23: Sc in each stitch around. (72 sc)
Round 24: Sc in each stitch around. (72 sc)
Slip stitch into the next stitch. Fasten off. Weave in ends.
Modifying for Other Sizes
To make a different size, simply stop the crown increases at the appropriate diameter and adjust the body length. The pattern for each increase round follows the same formula:
| Round | Pattern | Total Stitches |
|---|---|---|
| 1 | 8 hdc in magic ring | 8 |
| 2 | 2 hdc in each st | 16 |
| 3 | (hdc, inc) around | 24 |
| 4 | (hdc 2, inc) around | 32 |
| 5 | (hdc 3, inc) around | 40 |
| 6 | (hdc 4, inc) around | 48 |
| 7 | (hdc 5, inc) around | 56 |
| 8 | (hdc 6, inc) around | 64 |
| 9 | (hdc 7, inc) around | 72 |
| 10 | (hdc 8, inc) around | 80 |
Measure after each increase round. When the flat circle matches the crown diameter from the size chart, stop increasing and start the straight body rounds. Work the body until the hat reaches the correct length for that size.
Yarn Options for Hats
The yarn you choose affects both the look and function of your hat.
| Yarn Type | Warmth | Care | Best For |
|---|---|---|---|
| Acrylic (worsted) | Medium | Machine wash/dry | Everyday beanies, gifts |
| Wool or wool blend | High | Hand wash or gentle cycle | Cold weather, outdoor wear |
| Merino wool | High | Hand wash | Soft, non-itchy cold weather hats |
| Super bulky acrylic | High | Machine wash | Quick, chunky beanies |
| Cotton | Low | Machine wash | Warm-weather hats, chemo caps |
Troubleshooting Common Hat Problems
The Crown Is Pointy, Not Round
If the top of your hat forms a point rather than a gentle curve, the increase sections are too visible. This happens when all increases stack directly above each other, forming visible “seam lines.” To fix this, stagger your increases by starting each round at a slightly different point (your stitch marker will naturally shift slightly in spiral rounds, which helps).
Some pointiness is normal in the crown and usually disappears when the hat is worn on a head.
The Crown Is Ruffling
Ruffling means you have too many stitches for the diameter. Either your gauge is tighter than the pattern assumes (try a larger hook) or you’re working too many increase rounds. Measure the crown diameter frequently and stop increasing when you hit your target measurement.
The Hat Is Too Small
Either add one more increase round to the crown (making it wider) or go up a hook size, which creates a slightly looser gauge overall. An extra increase round of 8 stitches adds roughly 1 inch to the circumference.
The Hat Is Too Big
Stop the crown increases one round earlier, or go down a hook size. You can also add a tighter single crochet brim, which will snug the bottom edge slightly and help the hat stay on. When it comes to how to crochet a hat, preparation matters most.
Visible Seam/Ridge
If you’re working in joined rounds (slip stitch to close, chain to start), you’ll have a visible seam line. Switching to continuous spiral rounds (no joining, just keep going) eliminates this entirely. The trade-off is a slight “jog” where the round starts, but this is much less visible than a joined seam.

- 【Adjustable Brightness & Comfortable Hold】Enjoy the perfect combination of adjus
- 【Versatile Crochet Kit】Our light up crochet hook kit includes 11 interchangeable
- 【Beginner-Friendly Crochet Kit】Our light up crochet hook kit is specifically des
Adding Embellishments
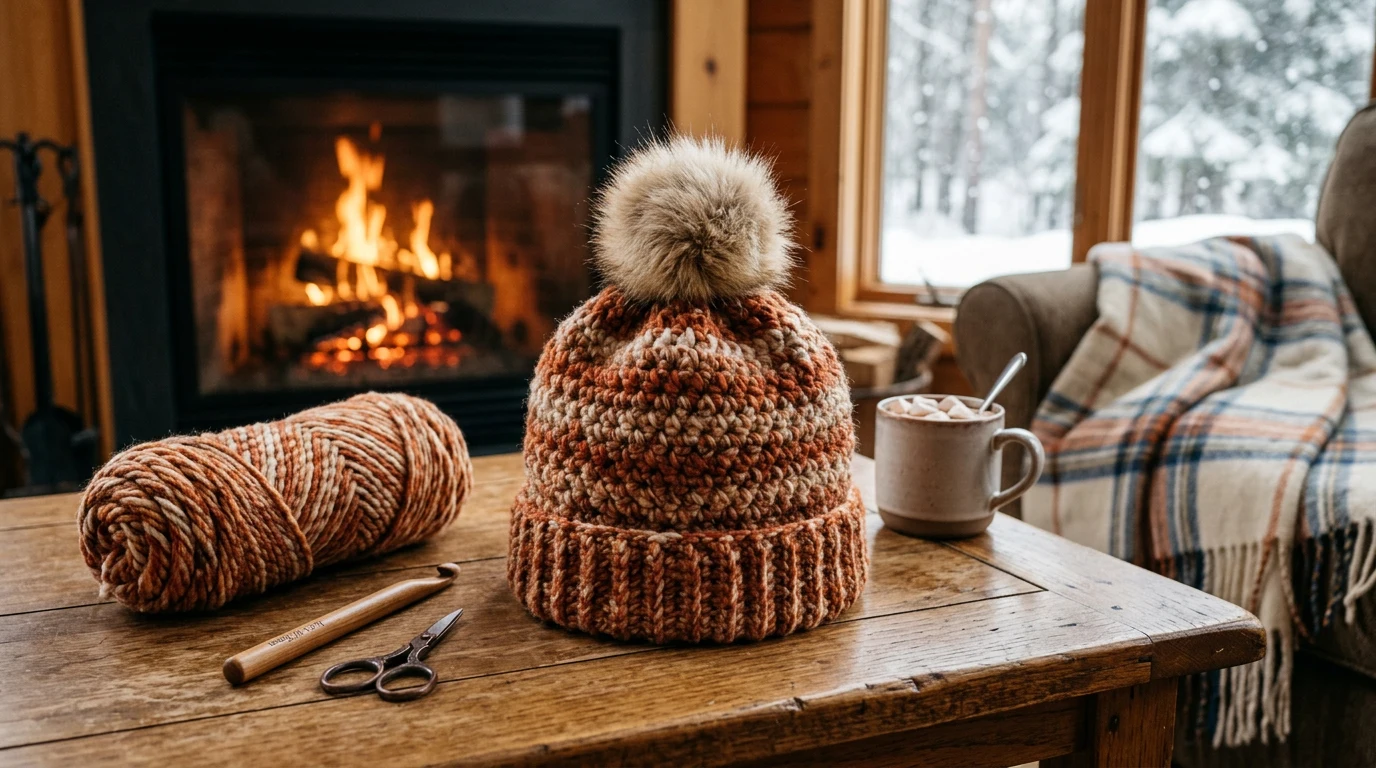
Pom-Pom
A pom-pom on top transforms a simple beanie into something special. You can make yarn pom-poms with a pom-pom maker or the fork method (wrap yarn around a fork, tie the center, cut the loops, and trim into a sphere). Faux fur pom-poms with snap-on buttons are also popular, as they can be removed for washing.
Ribbed Brim
For a stretchy, ribbed brim (similar to knit ribbing), work the last few rounds using front post and back post stitches. Alternating FPdc and BPdc around creates a textured rib that stretches to fit and snugs nicely around the forehead.
Folded Brim
Add an extra 2 to 3 inches of length to the body and fold the bottom edge up. This creates a thicker, warmer brim that also adds a polished look. No extra technique required, just extra rounds.
Beyond the Basic Beanie
Once you’ve made a basic beanie, the world of hat crochet opens up. Here are natural next steps:
- Textured stitches: Try the star stitch, bobble stitch, or basket weave for visual interest.
- Colorwork: Stripes, fair isle, or tapestry crochet add color without changing the basic construction.
- Messy bun hat: Same as a beanie but with a hole at the top for a ponytail or bun.
- Earflap hat: Add triangular flaps that extend down to cover the ears.
- Slouchy beanie: Add extra length to the body for an intentionally loose, relaxed fit.
Frequently Asked Questions
How long does it take to crochet a hat?
For a beginner using worsted-weight yarn, an adult beanie typically takes 3 to 5 hours. Experienced crocheters can finish one in 1 to 2 hours. With super bulky yarn and a large hook, a basic hat can be completed in under an hour. Baby hats are even faster, often taking 1 to 2 hours for beginners.
How much yarn do I need for a crochet hat?
An adult beanie in worsted-weight yarn uses approximately 150 to 200 yards. A child’s hat uses 100 to 150 yards. A baby hat uses 75 to 100 yards. A single standard skein of worsted-weight yarn (typically 200 to 360 yards) is usually enough for one or two adult hats, depending on the brand.
Should I use joined rounds or continuous spirals for a hat?
Continuous spirals are generally preferred for hats because they create a seamless surface with no visible join line. The slight “jog” where colors shift in spiral rounds is minimal with solid-color hats. If you’re doing colorwork with distinct color changes, joined rounds give cleaner color transitions. For a basic solid-color beanie, spirals are the better choice.
How do I make a crochet hat stretchy enough to fit well?
Half double crochet (hdc) creates naturally stretchy fabric, which is why it’s recommended for hats. Using yarn with some elasticity (wool or acrylic, rather than cotton) also helps. A ribbed brim using front post and back post stitches adds extra stretch at the opening. Avoid making the hat too tight. It should slide on easily and sit comfortably without squeezing.
Can I crochet a hat with straight needles instead of working in the round?
Crochet uses hooks, not needles (that’s knitting). But yes, you can crochet a hat flat in rows and then seam the edges together to form a tube. This approach leaves a visible seam but avoids working in the round, which some beginners find challenging. However, working in the round is a more versatile skill worth learning, and most hat patterns are written for rounds.
Frequently Asked Questions
How long does it take to crochet a hat for a beginner?
A basic crocheted hat is one of the most satisfying beginner projects because it’s small enough to finish in an evening or two. The time depends on your skill level and yarn thickness, but most beginners can complete a simple beanie in one to three evenings of crafting.
What skills do I need before learning how to crochet a hat?
You only need to know how to work in the round, do single or double crochet stitches, and understand basic increases. If you can already make a flat circle, you have all the foundational skills needed to create your first hat.
How do I know what size hat to make?
The article provides a complete size chart based on Craft Yarn Council guidelines that lists head circumference, crown diameter, and hat length for sizes ranging from preemie to large adult. Measure the intended wearer’s head circumference and match it to the chart to find the correct crown diameter and hat length for your project.
What is the basic structure of a crocheted beanie?
A beanie is made in two phases: the crown, where you start with a magic ring and work outward in rounds with increases until the flat circle reaches the right diameter, and the body, where you work straight rounds without increases until the hat reaches the correct length. This simple two-phase structure creates a flat circle that becomes a tube to fit your head.