If you want to know about how to crochet a granny, this guide covers everything you need. The granny square might be the most iconic crochet motif in existence. It’s been around since the early 1800s, it survived the 1970s craft explosion with its dignity intact, and it’s having yet another moment right now thanks to a new generation of crocheters who appreciate its simplicity and endless versatility. Learning how to crochet a granny square is one of those skills that unlocks an entire world of projects: blankets, bags, cardigans, cushion covers, and more.
This tutorial walks you through the classic granny square from the very first stitch. You don’t need to be an experienced crocheter. If you can chain and double crochet, you can make a granny square. And if you can’t do those things yet, we’ll point you in the right direction.
What Is a Granny Square?: How To Crochet A Granny
A granny square is a small crocheted motif worked from the center outward in rounds. The classic version uses clusters of double crochet stitches separated by chain spaces, creating a square with a characteristic open, lacy texture. Each round builds on the previous one, and the square gets bigger with every round you add.
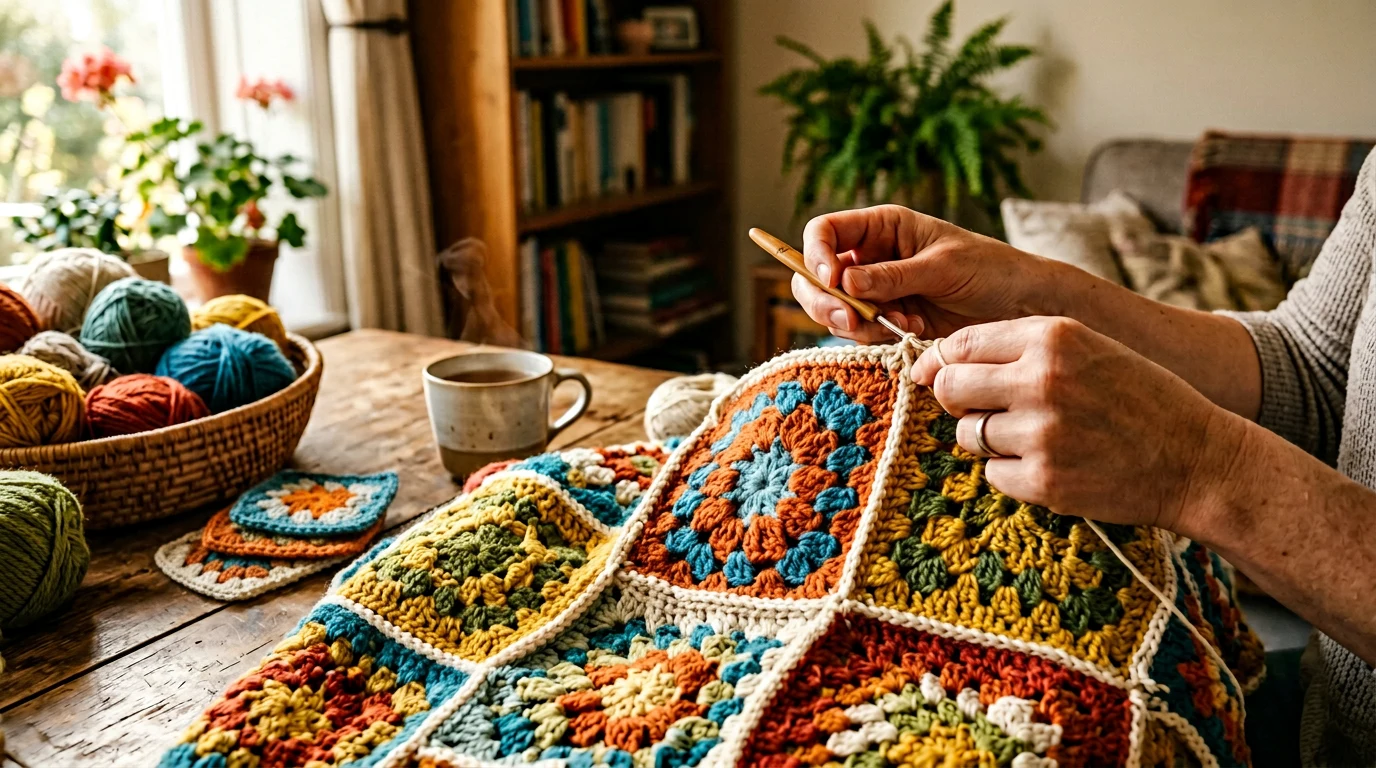
The beauty of the granny square is its modularity. You can make one big granny square that becomes a blanket, or dozens of small ones that you join together. You can use a single color or change colors every round for a rainbow effect. The basic structure stays the same while the creative possibilities expand endlessly.
What You’ll Need
- Yarn: Medium-weight (worsted/category 4) acrylic yarn. For your first granny square, one color is simplest. Once you’re comfortable, try 2 to 3 colors.
- Crochet hook: 5.0mm (H/8) or 5.5mm (I/9), matching your yarn’s recommended hook size.
- Scissors
- Yarn needle: For weaving in ends.
Stitches You’ll Use
The classic granny square uses only three techniques:
- Chain (ch): The basic loop-building stitch.
- Double crochet (dc): A tall stitch that forms the clusters.
- Slip stitch (sl st): Used to join rounds.
If you haven’t learned double crochet yet, practice making a few rows of dc on a straight piece before attempting the granny square. It’s a much more enjoyable experience when your hands already know the motion.

- 【Adjustable Brightness & Comfortable Hold】Enjoy the perfect combination of adjus
- 【Versatile Crochet Kit】Our light up crochet hook kit includes 11 interchangeable
- 【Beginner-Friendly Crochet Kit】Our light up crochet hook kit is specifically des
Step-by-Step: The Classic Granny Square
Starting: The Magic Ring
The magic ring (also called a magic circle or adjustable ring) creates a tight, closed center for your square. Here’s how to make one:
- Wrap the yarn around your index and middle fingers twice, creating a loop.
- Insert your hook through the center of the loop.
- Yarn over and pull up a loop.
- Chain 1 to secure it.
If the magic ring feels too fiddly, you can substitute it with “chain 4, slip stitch into the first chain to form a ring.” This creates a small center hole rather than a completely closed center, but it works just as well for granny squares.
Round 1: The Center
- Ch 3 (this counts as your first double crochet).
- Work 2 dc into the ring. You now have your first cluster of 3 dc.
- Ch 2. This creates the first corner space.
- Work 3 dc into the ring. Ch 2. (Second corner.)
- Work 3 dc into the ring. Ch 2. (Third corner.)
- Work 3 dc into the ring. Ch 2. (Fourth corner.)
- Slip stitch into the top of your starting ch-3 to close the round.
You should now have 4 clusters of 3 dc, separated by 4 ch-2 corner spaces. It will look like a small, slightly rumpled square. That’s exactly right.
Round 2: Building Out
- Slip stitch across the tops of the next 2 dc to reach the corner ch-2 space. (Or, if you prefer, fasten off and rejoin in any corner space.)
- Ch 3 (counts as first dc). Work 2 dc, ch 2, 3 dc all into the same corner space. This is your corner group.
- Ch 1.
- In the next corner space: 3 dc, ch 2, 3 dc. Ch 1.
- Repeat for the remaining two corners.
- Slip stitch into the top of the starting ch-3 to close the round.
Your square now has 4 corners (each with a 3dc-ch2-3dc group) and 4 sides (the ch-1 spaces between corners). The square shape is becoming more defined. Mastering how to crochet a granny takes practice but delivers great results.
Round 3: The Pattern Emerges
- Move to the next corner space (slip stitch or rejoin).
- Ch 3, 2 dc, ch 2, 3 dc in the corner space. Ch 1.
- Work 3 dc in the ch-1 space along the side. Ch 1.
- In the next corner: 3 dc, ch 2, 3 dc. Ch 1.
- Continue around: 3 dc in each side space, corner groups in each corner, with ch 1 between every cluster.
- Slip stitch to close.
The pattern from Round 3 onward is always the same: corner groups in corners, 3-dc clusters in the spaces along each side, with ch 1 separating every cluster. Each round adds one more cluster per side.
Round 4 and Beyond
Continue the same pattern for as many rounds as you want. A 4-round granny square measures roughly 4 to 5 inches across, which is a standard size for joining into blankets. A 6-round square makes a nice coaster or pot holder. You can keep going indefinitely, and a single large granny square with 15 to 20 rounds becomes a full blanket on its own.
How to Change Colors
Color changes are where granny squares really come alive. Here’s the cleanest method:
- Complete the last slip stitch of the round with your current color.
- Cut the yarn, leaving a 6-inch tail. Pull through to fasten off.
- Join the new color in any corner space: insert your hook, pull up a loop of the new color, and chain 3 to begin.
- Continue the round with the new color.
For a seamless join (no visible jog where colors change), always start new colors in the same corner. This keeps the color change point consistent and less noticeable.
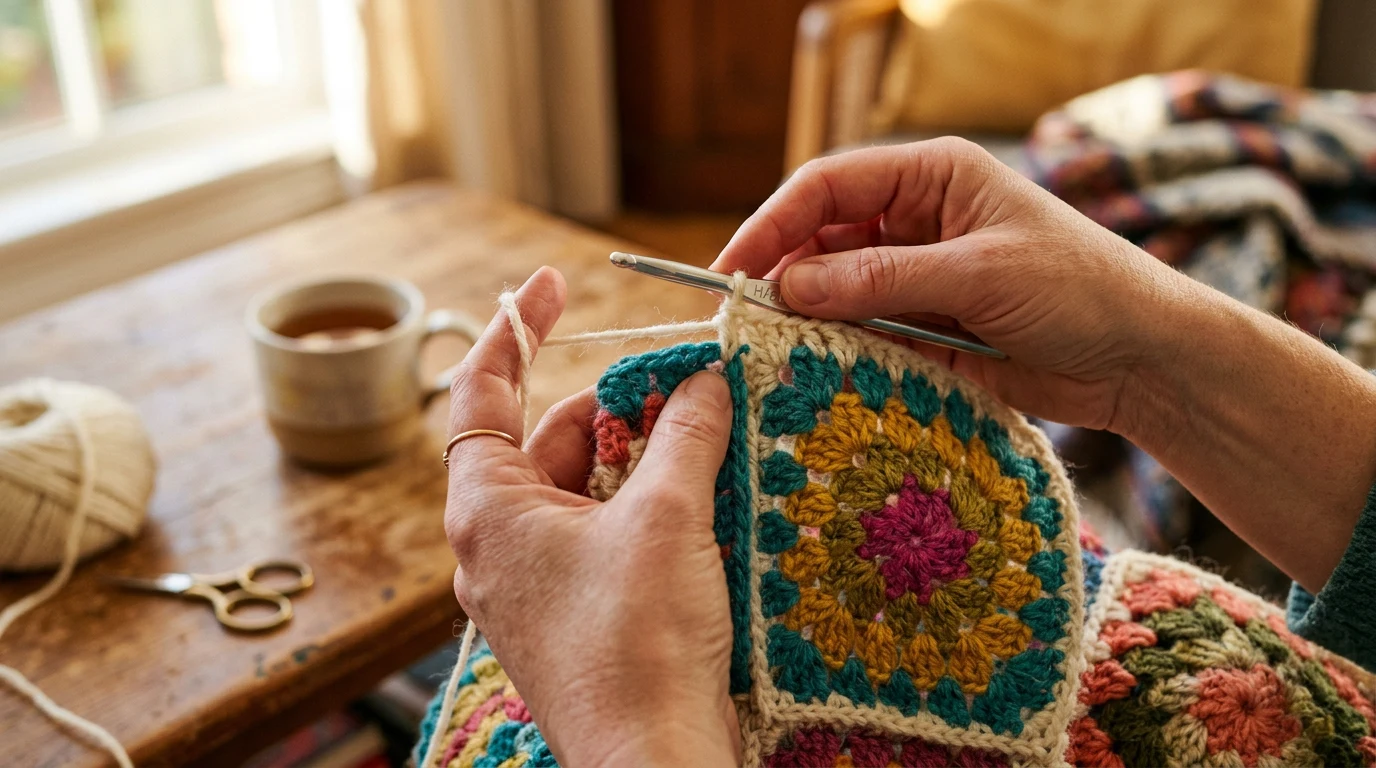
Some popular color schemes for granny squares:
- Classic: Different color each round, with a dark border
- Two-tone: Alternating two colors every round
- Solid with contrast border: One color for rounds 1 to 3, a pop color for the final round
- Scrappy: Random leftover yarns for every round (surprisingly charming)
Finishing Your Square
Fastening Off
After the last slip stitch of your final round, cut the yarn leaving a 6-inch tail. Pull the tail through the loop on your hook. Use a yarn needle to weave the tail through several stitches on the back of your work, then trim the excess. Repeat for all other tails.
Blocking
Blocking is the process of shaping your finished square by wetting it and pinning it flat. For acrylic yarn, you can steam block by holding a steam iron just above the surface (don’t press down). For cotton or wool, wet blocking works well: soak the square in water, gently squeeze out excess, pin it flat on a foam mat, and let it dry completely.
Blocking makes your squares uniform in size, which is essential if you’re joining multiple squares together. It also evens out tension irregularities and makes the stitch pattern look crisper.
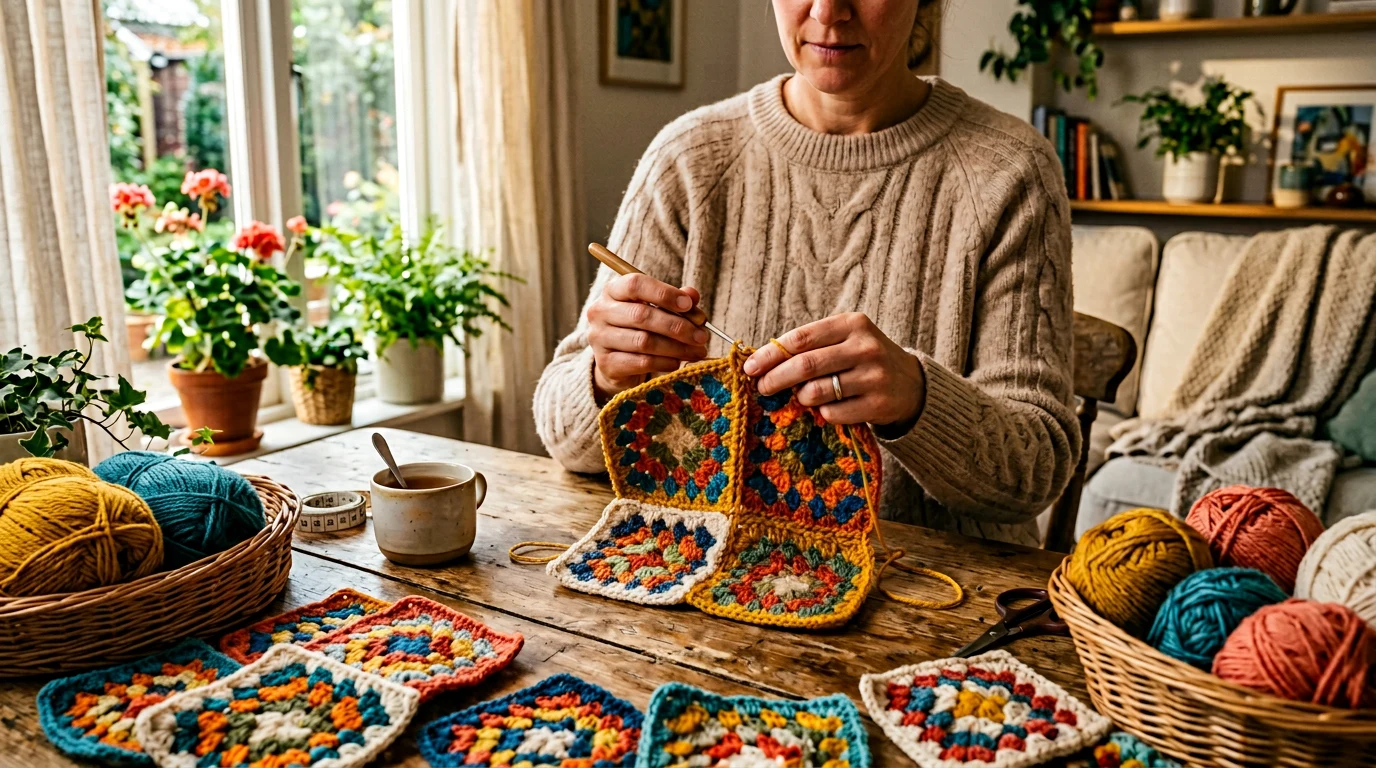
How to Join Granny Squares
If you’re making a blanket or project from multiple squares, you’ll need to join them. Here are the three most common methods. Understanding how to crochet a granny is key to a great craft hobby.
Whip Stitch Join
The simplest method. Place two squares right sides together, and use a yarn needle to sew through the back loops of both squares along one edge. Quick and invisible from the front.
Slip Stitch Join
Place squares right sides together and slip stitch through both layers using a crochet hook. This creates a visible ridge on the wrong side (or right side, if you prefer the decorative look).
Join-As-You-Go (JAYG)
Instead of making all squares separately and then joining, you connect each new square to the previous one during the final round. This method saves time and creates a flat, neat join. It’s worth learning once you’re comfortable with the basic square, as many experienced crocheters consider it the best joining method. The Ravelry granny square forums have excellent tutorials for this technique.
- Winds up to 10oz balls
- Adjustable swift included
- Heavy-duty clamp base
5 Projects You Can Make with Granny Squares
1. Granny Square Blanket
The classic. Make 48 to 63 squares (depending on size) and join them in a grid. A blanket made of many small squares is portable to work on anywhere, and each square feels like a small accomplishment. You can use matching colors for a cohesive look or different colors for every square for a patchwork style.
2. Tote Bag
Join 5 granny squares (4 sides plus a bottom) and add strap handles. Use cotton yarn for durability. A granny square tote is sturdy, machine washable, and gets compliments everywhere you take it.
3. Cushion Cover
Two large granny squares joined around three sides with a button closure on the fourth. Quick to make and an easy way to add handmade charm to your living space.
4. Cardigan or Shrug
A granny square cardigan uses just a few large squares assembled into a wearable garment. The “granny square cardigan” trend has been one of the most popular crochet fashion projects in recent years, appearing everywhere from TikTok to high-end fashion brands.
5. Coasters and Pot Holders
A single 3 or 4-round granny square in cotton yarn makes a functional coaster. Double it up (two squares sewn together) for a pot holder. These are excellent quick gifts and a satisfying use for leftover yarn.
Troubleshooting Common Granny Square Problems
Your Square Is Curling
Curling usually means your tension is too tight. Try going up a hook size, or consciously loosening your yarn tension. Blocking will also flatten a square that’s mildly curled. When it comes to how to crochet a granny, preparation matters most.
Your Square Is Ruffling
If your square is wavy and won’t lie flat, you might have too many stitches. Check that you’re not accidentally working extra clusters in the side spaces or putting extra stitches in the corners.
Your Square Isn’t Square
If it looks more like a diamond or a circle, your corner groups may not be positioned correctly. Make sure you’re putting the corner group (3 dc, ch 2, 3 dc) in the ch-2 space, not in a stitch. Count your clusters per side. Each side should have the same number.
Gaps Are Too Big
The classic granny square is inherently open and lacy. If you want a denser fabric, try a solid granny square variation where you add stitches in the chain spaces. Or simply go down a hook size to tighten the overall fabric.
Frequently Asked Questions
How big should a granny square be for a blanket?
A standard granny square for blankets is typically 4 to 6 inches across (about 4 rounds). This size is manageable to work on, easy to join, and allows for creative color arrangements. You’ll need roughly 48 squares for a throw blanket or 80 to 100 for a full-size blanket, depending on the finished dimensions you want.
Can I make a granny square without the magic ring?
Yes. Instead of a magic ring, you can chain 4 and join with a slip stitch to form a small ring. Work Round 1 into this ring instead of a magic ring. The only difference is a small hole in the center of your square, which is barely noticeable once the project is complete.
What is the best yarn for granny squares?
Medium-weight acrylic yarn is the most popular choice for granny squares because it’s affordable, available in many colors, easy to wash, and holds its shape well. Cotton yarn works great for items like dishcloths and bags. Wool adds warmth and a softer drape for blankets and wearable items.
How do I keep my granny squares the same size?
Consistent tension is the key, but even experienced crocheters have slight variations. Blocking is the real solution. By wetting and pinning each square to the same dimensions, you ensure uniformity before joining. A blocking mat with grid lines makes this process simple and accurate.
Why is it called a granny square?
The name comes from the association of crochet with grandmothers, particularly during the 1960s and 1970s craft revival when granny square blankets became enormously popular. The motif itself dates back to the early 19th century. Today, crocheters of all ages and backgrounds make granny squares, and the name is embraced as a nod to the craft’s heritage rather than a literal description.
Frequently Asked Questions
Do I need to know how to crochet before learning how to crochet a granny square?
No, you don’t need to be an experienced crocheter. If you can chain and double crochet, you can make a granny square, and the tutorial will guide you through each step from your very first stitch.
What supplies do I need to get started with my first granny square?
You’ll need medium-weight acrylic yarn, a 5.0mm or 5.5mm crochet hook that matches your yarn’s recommended size, scissors, and a yarn needle for weaving in ends. For beginners, starting with one color is simplest.
What makes the granny square so popular after all these years?
The granny square has remained popular since the early 1800s because of its simplicity and endless versatility. You can use it to create blankets, bags, cardigans, cushion covers, and countless other projects by either making one large square or joining multiple smaller ones together.
Can I use different colors when making a granny square?
Yes, once you’re comfortable with the basic technique, you can change colors every round to create a rainbow effect. The basic structure stays the same, but you have complete creative freedom with color combinations.