How to Make Soap at Home: A Beginner’s Guide
We participate in the Amazon Services LLC Associates Program and may earn a commission from qualifying purchases at no cost to you.
What You Will Make: Real Soap, From Scratch (or Close to It)
Soap making is one of those crafts that sounds harder than it actually is. Mix oils with lye, let chemistry do its thing, and a day later you have a bar of soap you made with your own hands. No factory, no mystery ingredients, no plastic packaging you did not ask for.
There are two ways to start. Melt and pour means you buy a pre-made soap base, melt it in the microwave, add scents and color, and pour it into a mold. You get soap in under an hour, no lye handling required. Cold process means you mix lye with oils from scratch, which gives you full control over every ingredient. It takes longer, needs safety gear, and feels more like a real craft. Most beginners start with melt and pour, then try cold process once they are hooked. This guide covers both.
What You Will Need
If you choose melt and pour, the shopping list is short. For cold process you need a few more tools. Here is what to gather before you start.
For Melt and Pour Soap
| Item | Price | Why You Need It | Buy |
|---|---|---|---|
| Complete Beginner Kit | $39.99 | Includes pre-measured melt and pour base (goat’s milk), silicone mold, 6 fragrance oils, colors, dried flowers, spoon, and labels. Everything but a microwave. | Check price |
| Goat’s Milk Melt & Pour Base | $18.95 | 2 lb block of pre-made soap base. Just melt, scent, and pour. Great for refills after your first batch. | Check price |
| Fragrance Oil Set | $16.99 | Set of 6 scents (peach, strawberry, coconut, plumeria, ocean breeze, pina colada) for candle and soap making. | Check price |
Total for melt and pour starter: about $40-$55, depending how much you buy at once. You already have a microwave and a knife.
For Cold Process Soap (Additional Tools)
| Item | Price | Why You Need It | Buy |
|---|---|---|---|
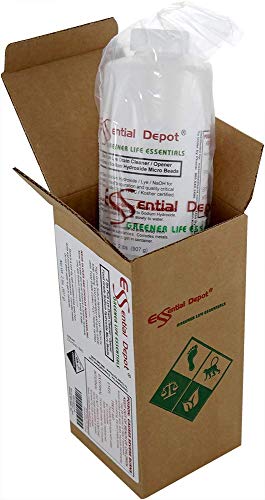
| Lye (Sodium Hydroxide), 2 lb | $27.97 | Food grade micro beads. The essential chemical that turns oils into soap. Store in a sealed container away from children and pets. | Check price |
| Immersion Blender | $14.99 | Handheld stick blender that mixes oils and lye to “trace” (the point where soap batter thickens). Much faster than whisking by hand. | Check price |
| Digital Gram Scale | $11.99 | Measures ingredients by weight to 0.1 g precision. Soap making requires exact ratios, not volume measurements. | Check price |
| Nitrile Gloves, Box of 100 | $9.99 | Protect your hands from lye solution. Powder-free, medium, blue. Absolutely non-negotiable when handling lye. | Check price |
| Safety Goggles | $15.90 | Anti-fog lab goggles. Lye solution can splatter. Protect your eyes. | Check price |
Total for cold process tools (on top of melt and pour gear): about $80 extra. You can skip the fragrance oils and use a plain unscented bar for your first batch.

You will also need two heat-safe glass or stainless steel bowls (no aluminum or nonstick, lye reacts with metal), a kitchen thermometer, and a well-ventilated workspace. Vinegar should be nearby in case of lye spills it neutralizes the alkali.
Step By Step: Cold Process Soap (The Real Beginner Recipe)
This is a basic 3-oil recipe that makes a gentle, creamy bar. It uses olive oil, coconut oil, and a small amount of castor oil for bubbles. If you cannot find castor oil, replace it with more olive oil the soap will still work.
Before You Start
Safety is not optional. Put on your gloves and goggles. Wear long sleeves. Open a window or work near a stove vent. Keep children and pets out of the room. Lye water is caustic until it reacts with the oils, and it takes about 24-48 hours to fully saponify.
Ingredients (Makes about 2 lb or 8-10 bars)
- Olive oil 450 g (any supermarket brand works, no need for expensive extra virgin; use pomace olive oil if you want a less green color)
- Coconut oil 250 g (76 degree melting point is standard)
- Castor oil 50 g (optional, adds bubbles, available at drugstores or Amazon)
- Distilled water 170 g (tap water has minerals that can interfere with saponification)
- Lye (sodium hydroxide) 95 g (food grade, as listed above)
- Optional: 15-20 ml of your chosen fragrance oil, added at trace
Step 1: Prepare Your Workspace
Cover your counter with newspaper or a silicone mat. Set out your scale, bowls, thermometer, immersion blender, gloves, goggles, and a bottle of vinegar. Measure your oils into one heat-safe bowl and set it aside.
Step 2: Mix the Lye Solution
Go outside or to a well-ventilated area, or open a window fully. In a heat-safe glass bowl or Pyrex measuring cup, weigh the distilled water. Slowly pour the lye into the water while stirring gently. Never pour water into lye it can cause a violent reaction. The mixture will heat up quickly to about 180-200 F and release fumes. Do not breathe the fumes. Set the bowl in a safe place to cool.

Step 3: Heat the Oils
Gently heat your measured oils in a pot or microwave until the coconut oil is fully melted. Stir to combine. Let the oils cool to about 100-110 F.
Step 4: Combine Lye and Oils
When both the lye solution and the oils are around 100-110 F (within 10 degrees of each other), slowly pour the lye solution into the oils. Use your immersion blender to mix. Keep the blender submerged to avoid incorporating air bubbles. Blend in short bursts, scraping down the sides, until the mixture reaches “trace.” Trace is when you drizzle a bit of batter across the surface and it leaves a visible line that stays for a moment before sinking. This can take 30 seconds to 5 minutes depending on your oils and temperature.
Step 5: Add Fragrance (Optional)
At trace, add your fragrance oil and blend for 5-10 seconds to incorporate. Some fragrances cause the batter to thicken quickly, so work fast.
Step 6: Pour Into the Mold
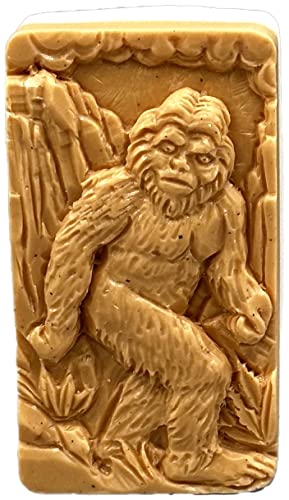
Pour the soap batter into your silicone loaf mold. Tap the mold gently on the counter to release air bubbles. Smooth the top with a spatula. If you want a textured top, use the back of a spoon to create swirls.

Step 7: Insulate and Wait
Cover the mold with a piece of cardboard or plastic wrap, then wrap it in a towel to insulate. Let it sit undisturbed for 24-48 hours. The soap will go through a gel phase where it heats up and completes saponification.
Step 8: Unmold and Cure
After 24-48 hours, the soap should be firm enough to unmold. If it is still soft or sticky, wait another 24 hours. Once unmolded, cut it into bars with a sharp knife. Place the bars on a rack or piece of parchment paper in a dry, well-ventilated area. Let them cure for 4-6 weeks. During this time the soap hardens and the pH drops to a skin-safe level. Cure time is the part you cannot rush.
Tips for Best Results
- Use a lye calculator. Every oil has a different saponification value. Online calculators like the one at Bramble Berry let you enter your oil amounts and tell you exactly how much lye and water to use. Never guess.
- Stick with simple recipes for your first three batches. Master a basic bar before adding swirls, layers, or natural colorants. Complexity adds variables that make it harder to tell what went wrong.
- Write down everything. Temperature, time to trace, how the batter looked, how long it took to unmold. A notebook is your most valuable soap making tool.
- Use distilled water only. Tap water minerals can cause the soap to develop white ash (soda ash) on top or affect the lather.
- Weigh in grams, not ounces or cups. Gram precision makes scaling recipes much easier.
Common Mistakes (and What NOT to Do)
- Using aluminum or nonstick tools. Lye reacts with aluminum, producing hydrogen gas and ruining your equipment. Stainless steel, silicone, glass, and heat-safe plastic only.
- Pouring water into lye. Always add lye to water. The reverse can cause a geyser of caustic liquid.
- Burning your nostrils. Lye fumes are irritating. Mix lye outside or under a vent, and do not lean over the container.
- Getting impatient with cure time. Soap that has not cured long enough can be harsh on skin and dissolves too fast. Four weeks is the minimum, six is better.
- Adding too much fragrance. Most fragrance oils are used at 3-6% of the total oil weight. Too much can cause the soap to seize (thicken instantly into a lump) or cause skin irritation.
- Testing a new recipe on a big batch. Always test new oil combinations or fragrance oils on a 500 g batch before scaling up. A failed 500 g batch is a small loss. A failed 5 lb batch hurts.
How to Level Up
Once you have made a few successful batches of plain cold process soap, you can explore more advanced techniques:
- Natural colorants. Clays (pink kaolin, rose clay), spirulina powder (green), turmeric (yellow), and activated charcoal (black/gray) create beautiful colors without synthetic dyes. Add them at trace, blended in with a whisk or stick blender.
- Swirl techniques. Separate your batter into smaller cups, color each one, and pour them into the mold in layers. Use a skewer to drag through the layers and create feathery swirls. Watch videos on the “itp swirl” and “hanger swirl” methods.
- Milk soaps. Replace the distilled water with goat’s milk or coconut milk (frozen, to prevent scorching from the heat of the lye). Milk soaps are luxuriously creamy.
- Hot process soap. Instead of pouring the batter into a mold and waiting, you cook it in a slow cooker until saponification completes in about an hour. The soap is usable the next day, though it still benefits from a short cure.
- Soap design. Invest in a multi-cavity silicone mold for individual bars, or a slab mold for cutting into custom shapes. Embed soaps (a small shape inside a clear bar) make great gifts.
For deeper learning, the Bramble Berry Soap Making Resource offers free tutorials, a lye calculator, and recipes for every skill level. It is one of the most trusted names in the soap making community and a great next stop after this guide.

Frequently Asked Questions
Is soap making safe for beginners?
Yes, with proper precautions. Lye is caustic, but it is also ordinary. Thousands of home soap makers handle it safely every day by wearing gloves and goggles, working in a ventilated area, and keeping vinegar nearby to neutralize spills. Melt and pour soap skips lye entirely and is a good place to start if you are nervous.
Can I make soap without lye?
No. Real soap requires a chemical reaction called saponification between an alkali (lye) and fats. However, melt and pour soap base comes ready-made from a manufacturer who already did the lye step for you. You melt, scent, and pour with no lye handling. The result is still real soap.
How long does homemade soap last?
A well-cured bar of cold process soap lasts 4-8 weeks of daily use if kept on a draining soap dish between uses. Melt and pour bars tend to last a bit less because the base retains more moisture. Store your cured soap in a cool, dry place wrapped in wax paper or in a cardboard box. Plastic traps moisture and can make bars sweat.
What oils make the best soap?
Olive oil makes a gentle, mild bar that lathers slowly. Coconut oil creates big bubbles and a good cleansing bar but can be drying at high percentages. Palm oil (or sustainably sourced alternative like shea butter or lard) adds hardness. Most beginners use a blend of 60-70% olive oil, 20-30% coconut oil, and 5-10% castor oil for a balanced bar.
Why did my soap develop white spots or ash?
White powder on top of your soap is soda ash, a harmless result of unsaponified lye reacting with carbon dioxide in the air. It does not affect the soap’s quality. You can wash it off with water or steam it off, or prevent it by spritzing the top of the soap with rubbing alcohol right after pouring. Grate the ash off if the look bothers you.

These statements have not been evaluated by the Food and Drug Administration. This information is not intended to diagnose, treat, cure, or prevent any disease. Content is for informational purposes only and is not medical advice; consult a qualified healthcare provider before starting any supplement. As an Amazon Associate we earn from qualifying purchases.
