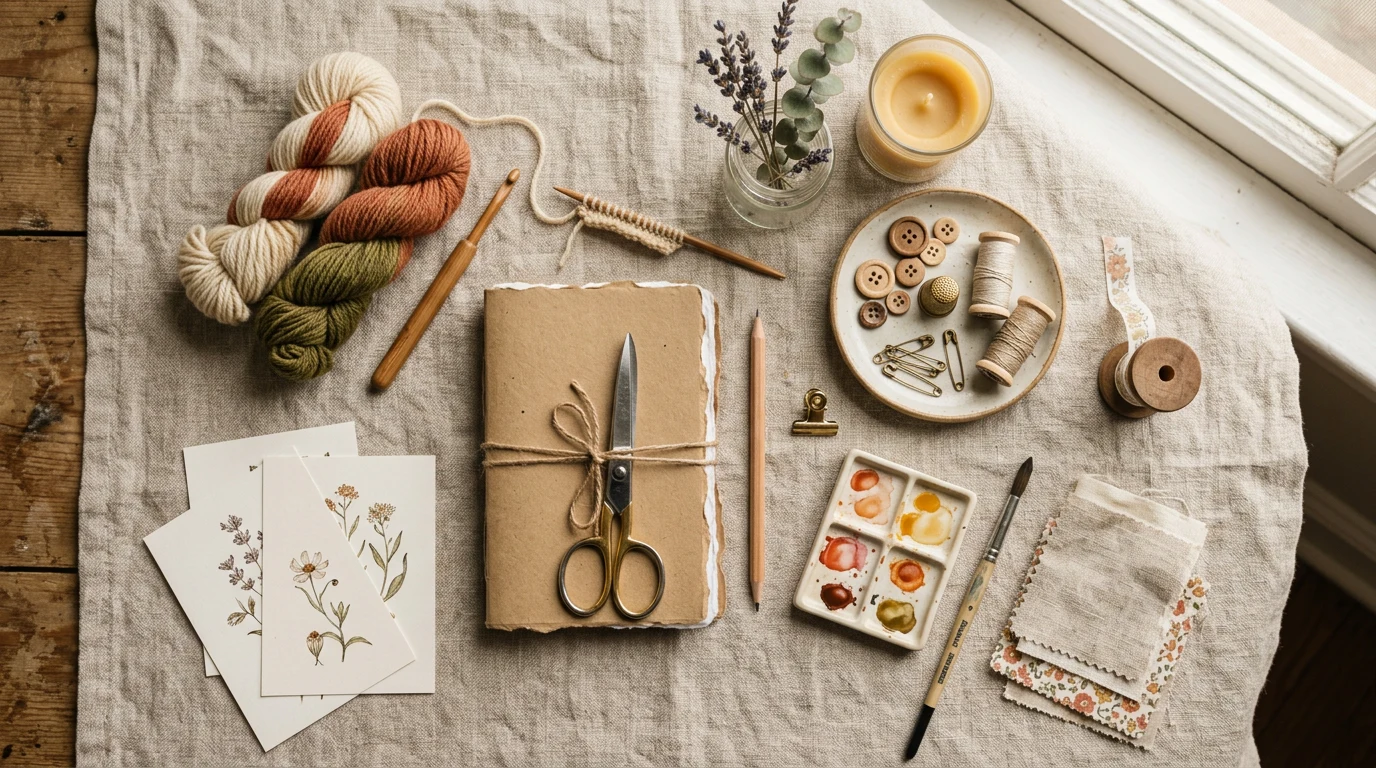
Starting your journey with punch needle for beginners opens the door to one of the most satisfying and accessible fiber arts you can imagine. This charming technique creates beautiful textured designs using just a simple tool, some fabric, and your favorite yarn or thread. Whether you’re looking for a new creative outlet or want to try something different from traditional embroidery, punch needle offers endless possibilities for crafters of every skill level.
Our reviews are based on aggregated verified buyer feedback, manufacturer specifications, and published expert opinion. Products are not independently tested by our team.
What Is Punch Needle?
Punch needle, also known as needle punching or Russian punch embroidery, is a textile art that creates loops of yarn or thread on the surface of fabric using a hollow needle tool. Unlike traditional embroidery where you pull thread through fabric from the front, punch needle works entirely from the back of your fabric, creating beautiful textured loops on the front surface.
The technique has roots dating back centuries, with variations found in many cultures around the world. The art of embroidery has evolved dramatically over time, and punch needle represents one of its most approachable modern forms. What makes this craft so appealing is its forgiving nature – mistakes are easily corrected, and the rhythm of punching becomes almost meditative.
The beauty of punch needle lies in its versatility. You can create everything from delicate florals using fine threads to bold geometric patterns with chunky yarn. The texture created by the loops adds dimension and interest to your work, making even simple designs look sophisticated. Reviews from crafters consistently mention how quickly they can complete projects compared to traditional embroidery, making it perfect for those who want satisfying results without spending months on a single piece.
Modern punch needle gained popularity through artists like Amy Oxford, who refined the tools and techniques to make them more accessible to contemporary crafters. Today, you’ll find punch needle artists creating everything from wall hangings and pillows to rugs and clothing embellishments. The technique works beautifully for both realistic and abstract designs, giving you complete creative freedom.
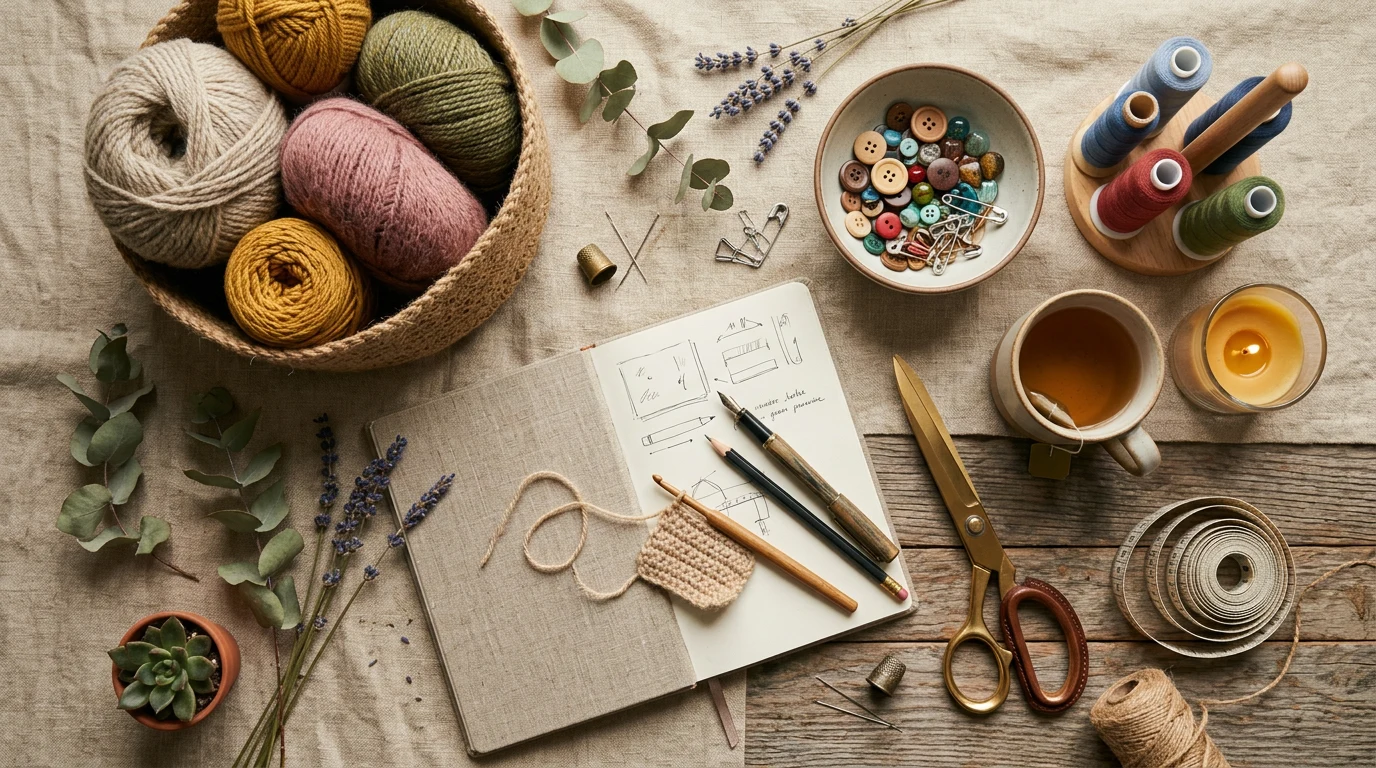
Essential Punch Needle Supplies
Getting started with punch needle requires surprisingly few supplies, which makes it an economical craft to begin. The basic toolkit includes a punch needle tool, appropriate fabric, yarn or thread, an embroidery hoop or frame, scissors, and a pattern or design. While you might be tempted to buy everything at once, starting with quality basics will serve you much better than accumulating many mediocre tools.
Your punch needle tool is the heart of your supplies. These specialized needles feature a hollow shaft that allows yarn to flow through smoothly, with an angled tip that helps create consistent loops. The handle typically has a comfortable grip, and many models include adjustable loop length settings. Buyers report that investing in a quality punch needle from the start makes the learning process much smoother and more enjoyable.
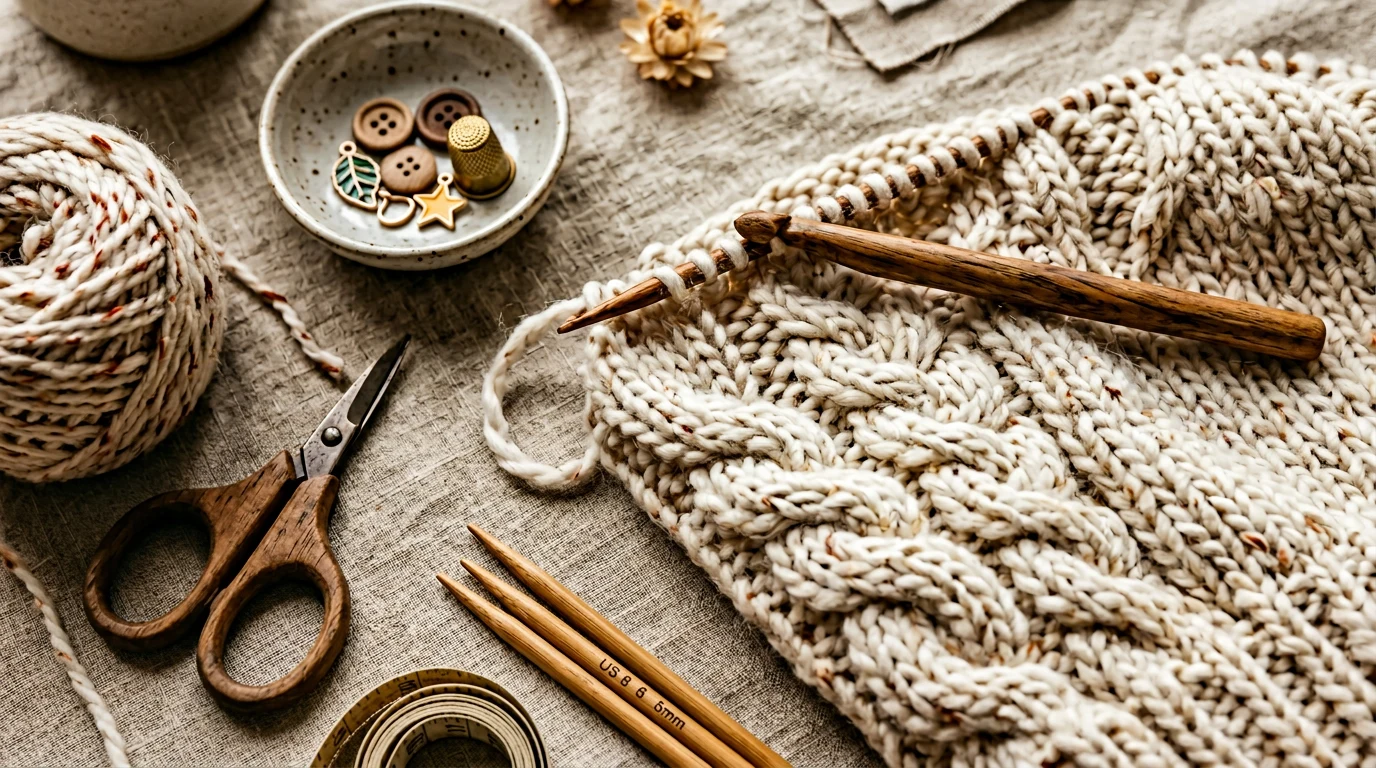
Fabric choice significantly impacts your success with punch needle. You need an evenly woven fabric with enough structure to hold the punched loops securely, yet open enough for the needle to penetrate easily. The most popular choice is monks cloth, a loose plain weave cotton fabric that provides the perfect balance of stability and workability. Alternatively, you might choose weaver’s cloth for finer work or linen for a more rustic appearance.
A proper frame or hoop keeps your fabric taut while you work, which is essential for creating even loops and preventing puckering. You’ll want something that holds your fabric drum-tight – loose fabric leads to inconsistent loop formation and frustrating results. Many beginners find that a larger frame or hoop works better than a small one, as it reduces the need for frequent repositioning.
Sharp fabric scissors are crucial for cutting your yarn to appropriate lengths and trimming finished work. You’ll also want a seam ripper or small scissors for making corrections. Some crafters also appreciate having a laying tool or needle threader to help guide stubborn yarns through the needle, especially when working with fuzzy or textured threads.
Choosing the Right Punch Needle Tool
Selecting your first punch needle tool can feel overwhelming with so many options available, but understanding the key differences will help you make an informed choice. The three main factors to consider are needle size, adjustability, and build quality. Each affects both your crafting experience and the types of projects you can tackle successfully.
The Oxford Punch Needle, created by Amy Oxford, remains the gold standard for many crafters. Available in sizes ranging from fine #10 (for delicate work with embroidery floss) to large sizes (for bulky yarns), these tools offer excellent consistency and durability. Reviews consistently praise their smooth operation and the crisp, even loops they create. The fine #10 is perfect for detailed work, while the regular #9 handles worsted weight yarn beautifully.
The Ultra Punch needle has gained popularity among beginners due to its adjustable loop length feature. This single tool can handle various yarn weights by simply turning a dial to change the loop height. According to verified reviews, this versatility makes it an excellent choice for those just starting out, as you can experiment with different effects without buying multiple needles. The comfortable grip and smooth action make long crafting sessions more enjoyable.
For budget-conscious beginners, the Lavor punch needle offers decent performance at a lower price point. While it may not have the refinement of higher-end tools, buyers report that it works well for learning basic techniques and completing simple projects. The fixed loop length means you’ll need multiple needles if you want to work with different yarn weights, but for getting started with one type of project, it provides good value.
When choosing your needle size, consider the yarn weight you plan to use most often. Fine needles (#10-#9) work beautifully with embroidery floss and sport weight yarns, creating delicate, detailed work. Regular needles (#8-#9) handle worsted weight yarn perfectly and are ideal for most beginner projects. Larger needles accommodate bulky yarns and create bold, textural effects that work well for rugs and wall hangings.
Pay attention to the needle’s threading system as well. Some needles thread from the tip, while others thread from the handle. Each has advantages – tip-threading needles often provide smoother yarn flow, while handle-threading designs can be easier to thread initially. Many experienced crafters eventually own multiple needles to match different project requirements, but starting with one quality adjustable needle gives you the most flexibility.
Best Fabric for Punch Needle
Choosing the right fabric forms the foundation of successful punch needle work, and understanding fabric characteristics will save you frustration and disappointing results. The ideal punch needle fabric has an even, loose weave that allows your needle to penetrate easily while still providing enough structure to hold loops securely. It should also have minimal stretch to prevent distortion during and after stitching.
Monks cloth stands as the most popular choice for punch needle work, and for good reason. This cotton fabric features a plain weave construction with a 12-count grid, meaning there are 12 threads per inch. The loose weave allows needles to slip through easily, while the cotton fibers provide enough grip to hold loops in place. Buyers consistently report excellent results with monks cloth, noting that it works well with both fine and medium-weight yarns.
When shopping for monks cloth, you’ll find it available in natural, white, and sometimes dyed colors. Natural monks cloth has a pleasant cream color that works well as a background for most designs, while white provides a crisp, clean base for bright colors. Some crafters prefer to use the natural color as it’s less stark and hides small gaps between stitches more forgivingly.
Weaver’s cloth offers a finer alternative to monks cloth, with an 18-count weave that creates more detailed work possibilities. This cotton fabric works beautifully for intricate designs and fine threads, though it requires a smaller needle size. Reviews from detail-oriented crafters praise weaver’s cloth for its ability to support precise work, though beginners might find monks cloth more forgiving for learning basic techniques.
Linen fabric provides another excellent option, particularly for those seeking a more rustic or traditional appearance. The natural texture and slightly irregular weave of linen add character to finished pieces. However, linen can be more challenging for beginners as the fibers are stiffer and the weave less predictable than cotton alternatives. Experienced crafters often prefer linen for its durability and the beautiful way it ages over time.
Avoid fabrics that are too tightly woven, stretch significantly, or have surface treatments that might interfere with needle penetration. Canvas, denim, and most quilting cottons prove too dense for comfortable punching. Similarly, knit fabrics and those with significant lycra content will stretch during work and may not hold loops securely. When in doubt, test a small area before committing to a large piece of fabric.
Selecting Yarn and Thread
Your choice of yarn or thread dramatically affects both the appearance and success of your punch needle projects. The key is matching your fiber choice to your needle size and desired outcome. Understanding how different fibers behave in punch needle work will help you achieve the results you envision and avoid common beginner frustrations.
Embroidery floss remains a favorite for detailed punch needle work, particularly when using fine needles. The six-strand construction allows you to adjust thickness by separating strands, and the wide color selection enables intricate shading and blending. According to crafters’ reviews, using all six strands together creates full, lush loops, while using fewer strands produces more delicate effects. The smooth cotton construction flows easily through needles and creates consistent loops.
Worsted weight wool yarn provides excellent results for most punch needle projects and is particularly beginner-friendly. Wool’s natural elasticity helps loops stay in place, and the fiber’s texture grips well in the fabric backing. Pure wool yarns like those from established manufacturers create beautiful, resilient loops that maintain their shape over time. Many beginners find wool more forgiving than cotton yarns when learning proper tension and loop formation.
Cotton yarns offer different characteristics than wool, creating slightly stiffer loops with excellent color clarity. They work particularly well for geometric designs and areas where you want crisp definition between colors. However, cotton can be less forgiving than wool, requiring more consistent tension to achieve even results. Mercerized cotton yarns provide extra sheen and durability, though they may be slightly more slippery to work with initially.
Acrylic yarns provide an economical option for large projects or practice pieces. Modern acrylic yarns have improved significantly in softness and appearance, though they may not have the same luxurious feel as natural fibers. They’re excellent for projects that need frequent washing or for outdoor use. Buyers report that higher-quality acrylic yarns punch more smoothly than bargain varieties, so investing in better yarn pays off in easier crafting.
Specialty yarns like mohair, alpaca, and silk blends can create stunning effects in punch needle work. Mohair adds a beautiful halo effect around loops, while silk provides lustrous highlights. However, these fibers can be more challenging to work with due to their texture or slipperiness. Save specialty yarns for accent areas or after you’ve mastered basic techniques with more conventional fibers.
When considering yarn weight, remember that your needle size must accommodate the fiber thickness. Fine needles work best with embroidery floss and sport weight yarns, while regular needles handle worsted weight beautifully. Trying to force thick yarn through a small needle creates frustration and poor results, while using thin thread in a large needle produces sparse, inadequate coverage.
How to Set Up Your Frame
Proper frame setup is absolutely critical for successful punch needle work, yet it’s often overlooked by beginners eager to start stitching. Your fabric must be stretched drum-tight in the frame to create consistent loops and prevent puckering or distortion. Taking time to set up your frame correctly will dramatically improve your results and make the punching process much more enjoyable.
Traditional embroidery hoops can work for small punch needle projects, but they have limitations. The narrow clamping area can create permanent creases in your fabric, and maintaining proper tension becomes challenging with larger designs. If you choose to use an embroidery hoop, select one at least 8 inches in diameter to minimize repositioning, and place tissue paper between the hoop and fabric to prevent marking.
Gripper strip frames, also called snap frames or Q-snap frames, offer significant advantages for punch needle work. These frames use plastic strips with teeth that grip the fabric edges, distributing tension evenly across the entire surface. Reviews from regular punch needle crafters consistently praise gripper frames for their ability to maintain consistent tension without marking the fabric. They’re available in various sizes and can accommodate both small and large projects comfortably.
The Morgan lap stand represents the premium option for serious punch needle enthusiasts. This adjustable wooden frame system allows you to work hands-free while maintaining perfect fabric tension. The frame tilts to your preferred angle, reducing neck and back strain during long crafting sessions. While more expensive than other options, buyers report that the comfort and convenience justify the investment, particularly for larger projects or frequent crafting.
When mounting your fabric, start by cutting it at least 4 inches larger than your design on all sides. This extra fabric provides adequate material for proper frame mounting and finishing. Center your design area in the frame, ensuring the fabric grain runs straight both horizontally and vertically. Crooked grain can cause distortion as you work and difficulty in finishing your piece properly.
Achieving proper tension requires pulling the fabric until it feels tight like a drum skin. Test the tension by gently tapping the fabric surface – it should produce a slight bouncing resistance. Loose fabric allows loops to pull through to the back, while overly tight fabric can be difficult to penetrate and may distort when released from the frame. Finding the right balance takes practice, but consistent tension leads to professional-looking results.
For larger projects that exceed your frame size, you’ll need to plan your approach carefully. Start with the center area and work outward, repositioning the frame as needed. When moving the frame, be gentle to avoid disturbing completed loops. Some crafters prefer to complete entire sections before repositioning, while others work in a systematic grid pattern. Either approach works, but consistency in your method helps maintain even loop density throughout the piece.
Basic Punch Needle Technique
Mastering basic punch needle technique involves developing a consistent rhythm and understanding the mechanics of loop formation. Unlike other embroidery techniques, punch needle work happens entirely from the back of the fabric, which can feel counterintuitive at first. However, once you develop muscle memory for the proper motions, you’ll find the technique surprisingly relaxing and meditative.
Begin by threading your needle according to the manufacturer’s instructions. Most needles thread either from the tip or through the handle, and getting this right is essential for smooth yarn flow. Cut your yarn to a manageable length – typically 18 to 24 inches works well. Longer lengths can tangle, while shorter pieces require frequent rethreading. Leave about 3 inches of yarn tail at the starting point to secure later.
Hold your punch needle like a pencil, with your fingers positioned comfortably on the handle for control. The needle should be perpendicular to the fabric surface, not at an angle. This vertical position ensures consistent loop height and prevents the needle from catching on fabric threads. Your other hand should rest lightly on the fabric to provide stability without restricting movement.
The punching motion involves pushing the needle completely through the fabric until the handle nearly touches the surface, then pulling it back up just until the tip clears the fabric. This complete penetration creates the loop on the front side, while bringing the needle up too far pulls the loop back through. Many beginners struggle with this partial withdrawal – resist the urge to lift the needle high above the fabric surface.
Develop a steady rhythm by counting or using a mental beat. Push down, lift slightly, move to the next position, repeat. The spacing between punches typically should be about the width of your needle or slightly closer for full coverage. Too much space between punches creates sparse coverage, while punching too close together can crowd the loops and create uneven texture.
When changing directions or turning corners, take extra care to maintain consistent spacing and depth. Sharp direction changes can create thin areas if you’re not mindful of punch placement. Some crafters prefer to work in rows, while others follow the contours of their design elements. Both approaches work well – choose the method that feels most natural to you.
Watch your yarn tension as you work. The yarn should flow freely through the needle without binding or catching. If you notice the yarn getting tight, pause and let it relax before continuing. Forcing tight yarn through the needle can create uneven loops and make the work more difficult than necessary. Similarly, yarn that’s too loose may not form proper loops, so finding the right balance is key.
Practice on a small test piece before beginning your main project. This allows you to adjust your technique, test color combinations, and get comfortable with your tools without the pressure of creating a perfect finished piece. Most experienced crafters recommend spending at least 30 minutes practicing basic stitches before attempting a complete design.
Your First Punch Needle Project
Choosing the right first project sets you up for success and builds confidence in your new skills. The ideal beginner project should be simple in design, manageable in size, and forgiving of small imperfections. A small geometric design, simple floral motif, or abstract pattern works much better than an intricate realistic image that requires precise shading and detail work.
Consider starting with a design that’s roughly 4 to 6 inches square – large enough to be satisfying but small enough to complete in a few crafting sessions. This size allows you to practice your technique without committing to a lengthy project. You might choose a simple heart, star, flower, or geometric shape that can be completed with 2-3 colors. Easy punch needle patterns provide excellent starting points with clear instructions and appropriate complexity for beginners.
Plan your color scheme carefully for maximum impact with minimal complexity. Two or three colors that contrast well create more visual interest than a single color, while too many colors can become overwhelming for a first project. Consider using a medium-toned background with lighter and darker accents, or try a simple two-color combination that you find appealing.
Transfer your design to the fabric using a washable fabric marker or chalk. Keep the lines light – heavy marks may show through lighter colored yarns. Some crafters prefer to trace the design onto paper first, then pin it to the back of the fabric as a guide. Either method works well, so choose the approach that gives you confidence in following your design accurately.
Work systematically through your design, completing one color area at a time. This approach helps maintain consistent color placement and makes it easier to see your progress. Start with the center elements and work outward, or begin with the background and add details. There’s no single correct approach – develop a system that makes sense for your particular design and stick with it.
Don’t worry about achieving perfect coverage on your first project. Slight variations in loop height and spacing are normal and often add character to handmade pieces. Focus on maintaining consistent needle depth and developing a steady rhythm rather than obsessing over every individual loop. Remember that viewers will see the overall effect from a normal viewing distance, not examine every stitch up close.
As you work, step back periodically to assess your progress. This broader view helps you spot areas that need attention and ensures you’re maintaining good color balance throughout the piece. If you notice thin spots, simply add more punches in those areas. If some loops seem too high, you can trim them slightly with sharp scissors to create more even texture.
When you complete your design area, secure any loose yarn ends by threading them back through existing loops on the reverse side. Trim excess fabric to about 2 inches beyond the worked area, then decide how you’d like to finish your piece. Simple options include mounting in an embroidery hoop for display, sewing onto a pillow front, or framing like traditional artwork.
Troubleshooting Common Problems
Every beginner encounters challenges when learning punch needle, and understanding common problems and their solutions can save hours of frustration. Most issues stem from technique rather than tools, which means they’re easily corrected once you understand what’s causing them. Recognizing these problems early and making adjustments will improve your results dramatically.
Loops pulling out or disappearing is perhaps the most common beginner frustration. This usually happens when you lift the needle too high between punches, pulling the loop back through the fabric. The solution is to practice the partial withdrawal technique – bring the needle up just until the tip clears the fabric surface, no higher. Buyers report that this takes practice to master, but once you develop the muscle memory, the problem disappears completely.
Uneven loop heights create a scraggly, unprofessional appearance that disappoints many beginners. Inconsistent needle depth causes this problem – sometimes you’re not pushing the needle fully through, other times you’re varying the distance you pull back. Focus on pushing the needle handle almost to the fabric surface with each punch, then lifting just enough to clear the tip. Practicing on a sample piece helps develop consistency.
Yarn catching or binding in the needle interrupts your rhythm and can damage delicate fibers. This often results from threading errors, using yarn that’s too thick for your needle, or accumulated lint in the needle shaft. Check your threading first – make sure the yarn flows smoothly through the entire path. Clean your needle periodically with a pipe cleaner or thin brush to remove fiber buildup.
Sparse coverage where fabric shows through the loops typically indicates spacing problems. Either your punches are too far apart, or you’re not creating full loops due to technique issues. The solution involves working more closely – punch spacing should be about the width of your needle or slightly less. Don’t be afraid to add extra punches in thin areas to achieve full coverage.
Fabric puckering or distortion usually stems from inadequate frame tension or working too tightly. Your fabric should be stretched drum-tight in the frame, and your yarn should flow freely without resistance. If you notice puckering developing, stop and retension your fabric. Sometimes rotating the frame slightly can eliminate stress points that cause distortion.
Color bleeding or marking can ruin an otherwise beautiful project. This happens when using poor-quality yarns with fugitive dyes or when fabric markers aren’t truly washable. Test your yarns for colorfastness before beginning, and choose fabric markers specifically designed for needlework. If bleeding occurs, sometimes gentle rinsing in cold water can minimize the damage.
Thread breakage during punching often indicates that your needle eye or shaft has rough spots that catch the fiber, or that you’re working with yarn that’s inappropriate for your needle size. Examine your needle carefully for burrs or damage, and consider whether your yarn choice matches your tool’s specifications. Sometimes switching to a different yarn type or brand solves persistent breakage problems.
Design distortion where your finished piece doesn’t match your planned proportions usually results from inconsistent frame tension or fabric grain problems. Always ensure your fabric is mounted square to the frame with the grain running straight. If distortion occurs, you may be able to correct it by gently steaming and blocking the finished piece, though prevention through proper setup works better.
Next Steps and Advanced Techniques
Once you’ve mastered basic punch needle techniques and completed a few successful projects, you’ll naturally want to explore more advanced possibilities. The beauty of punch needle lies in its versatility – you can create everything from delicate pictorial work to bold sculptural pieces by expanding your technique repertoire and experimenting with different materials and approaches.
Advanced shading techniques allow you to create realistic dimensional effects in your work. By varying loop heights within the same color family, you can suggest light and shadow, depth and form. This involves using different needle sizes or adjusting your technique to create subtle height variations. Many advanced practitioners also blend colors by alternating yarns within the same area, creating smooth color transitions that rival traditional painting techniques.
Mixed media approaches open exciting creative possibilities. You can combine punch needle with traditional embroidery stitches, appliqué elements, beading, or even incorporate found objects into your work. Some artists create dimensional effects by leaving certain loops uncut while trimming others to create pile height variations. Others incorporate ribbon, metallic threads, or specialty fibers to add texture and visual interest.
Three-dimensional punch needle work takes the craft into sculptural territory. By working on shaped forms or creating standalone sculptural elements, you can move beyond flat wall pieces into functional art. This might involve punch needle work on clothing, accessories, or home décor items. Some artists create vessels, jewelry, or architectural elements using punch needle techniques adapted to three-dimensional forms.
Large-scale projects like rugs, wall hangings, or room dividers require different planning and execution strategies. You’ll need to consider structural support, durability requirements, and practical finishing techniques. Working large also demands consistent technique across extended time periods and may require collaboration or assistants for very ambitious pieces. Understanding the relationship between punch needle and rug hooking can inform your approach to larger functional pieces.
Exploring different fabric bases beyond traditional monks cloth opens new creative territories. Some advanced practitioners work on canvas, linen, or even unconventional surfaces like mesh or perforated materials. Each surface brings different characteristics to the finished work, from texture and durability to color interaction and visual effects. Experimenting with various bases helps you develop a personal style and expand your technical repertoire.
Building your supply collection thoughtfully supports advancing skills. This might mean investing in additional needle sizes, exploring specialty yarns, or acquiring better frames and finishing tools. Understanding the full range of available supplies helps you make informed choices that support your developing interests rather than simply accumulating tools.
Joining the punch needle community through online forums, local guilds, or workshop participation accelerates your learning and provides inspiration for new projects. Experienced crafters are typically generous with advice and encouragement, and seeing others’ work sparks new ideas and techniques you might not discover working alone. Many lifelong friendships form around shared creative interests, adding social benefits to your crafting journey.
Starting your punch needle journey opens the door to a wonderfully satisfying creative practice that grows with you over time. From simple beginner projects to complex artistic expressions, this versatile technique offers endless possibilities for exploration and personal development. Remember that every expert was once a beginner, so be patient with yourself as you develop skills, and celebrate each small success along the way. Your punch needle adventure is just beginning, and the only limit is your imagination and willingness to experiment with this delightful fiber art form.
Frequently Asked Questions
What supplies do I need to start punch needle for beginners?
To get started, you’ll need a punch needle tool, fabric to work on, and yarn or thread in your chosen colors. The beauty of this craft is that you don’t need many supplies, making it an affordable hobby to begin with just these basic essentials.
Is punch needle easier than traditional embroidery?
Yes, punch needle is often considered more forgiving and easier to learn than traditional embroidery because mistakes can be easily corrected and the technique works from the back of the fabric. Many crafters also report completing projects much faster with punch needle compared to hand embroidery.
How long does it take to complete a punch needle project?
The time varies depending on the size and complexity of your design, but many crafters find they can complete projects more quickly than with traditional embroidery. Simple projects can take just a few hours, while larger or more detailed designs may take several days of relaxing crafting time.
Can you create different types of designs with punch needle?
Absolutely, punch needle is incredibly versatile and allows you to create everything from delicate florals with fine threads to bold geometric patterns using chunky yarn. The textured loops add dimension to any design, making even simple patterns look sophisticated and beautiful.