If you want to know about 15 essential embroidery stitches for, this guide covers everything you need. Learning embroidery stitches is a bit like building a vocabulary. The more stitches you know, the more eloquently you can express your creative ideas through thread. The good news is that you do not need hundreds of stitches to create stunning work. A solid repertoire of 15 fundamental stitches covers the vast majority of patterns and gives you the flexibility to tackle almost any design.
This guide walks you through each stitch with clear, written instructions that you can follow at your own pace. We have organized them from simplest to most complex, so you can work through them in order or jump to whichever stitch your current project requires.
Before You Begin: Quick Setup Notes: 15 Essential Embroidery Stitches For
For practicing these stitches, set up a piece of cotton fabric in a 6-inch or 7-inch hoop with good tension. Use two strands of embroidery floss in a color that contrasts well with your fabric (dark thread on light fabric is easiest to see). Cut your floss to about 18 inches, which is long enough to practice without tangling.
Draw straight lines, curves, and small shapes on your practice fabric with a water-soluble marker. These give you guides to stitch along as you learn each technique.
Line Stitches
Line stitches create outlines, text, stems, and borders. They are the backbone of most embroidery designs.
1. Running Stitch
Difficulty: Easiest | Best for: Borders, simple outlines, decorative dashes
The running stitch is where everyone starts. It creates an evenly spaced dashed line.
- Bring your needle up through the fabric at your starting point (A).
- Push the needle back down 3-4mm ahead (B).
- Bring the needle back up 3-4mm past point B (C), leaving a gap equal to your stitch length.
- Repeat, keeping stitch length and spacing as consistent as possible.
Tips: You can “load” multiple stitches onto your needle at once by weaving it in and out of the fabric before pulling through. This speeds up the process considerably. Aim for stitches between 3mm and 5mm for the neatest appearance.
2. Back Stitch
Difficulty: Easy | Best for: Outlines, lettering, any design element needing a solid line
Back stitch is the most essential outline stitch in embroidery. It creates a continuous, solid line.
- Bring your needle up one stitch length ahead of your starting point (A).
- Push the needle down at the starting point (B), creating your first stitch going “backward.”
- Bring the needle up one stitch length ahead of point A (C).
- Push the needle back down at point A, connecting to the previous stitch.
- Continue: up ahead, back down to meet the last stitch.
Tips: Keep your stitches uniform in length (about 3mm works well). For curves, use shorter stitches. The back stitch is the default choice for outlines in most patterns, so mastering it pays off enormously.
3. Stem Stitch
Difficulty: Easy | Best for: Curved lines, plant stems, vines, flowing designs
Stem stitch creates a slightly twisted, rope-like line that handles curves beautifully.
- Bring your needle up at your starting point (A).
- Push the needle down one stitch length to the right (B).
- Bring the needle back up at the midpoint between A and B (C), keeping the thread below your needle.
- Push down one stitch length ahead (D).
- Come back up at the midpoint between C and D, again keeping the thread below the needle.
- Repeat, always keeping the working thread on the same side.
Tips: Consistency matters here. Always keep the thread on the same side of the needle (below for a left-leaning twist, above for right-leaning). Shorter stitches produce smoother curves.
4. Split Stitch
Difficulty: Easy | Best for: Outlines, text, gentle curves, outlining filled areas Mastering 15 essential embroidery stitches for takes practice but delivers great results.
Split stitch creates a fine, chain-like line by splitting each previous stitch with the needle.
- Make a single small straight stitch from A to B.
- Bring your needle up through the center of the stitch you just made, piercing the thread and splitting it apart.
- Push the needle down one stitch length ahead.
- Come back up through the center of this new stitch.
- Repeat along your line.
Tips: This stitch requires an even number of strands (2 or 4) so you can split them evenly. Split stitch also works beautifully as a padding stitch underneath satin stitch to give it a raised, smooth appearance.
5. Chain Stitch
Difficulty: Easy-Moderate | Best for: Bold outlines, decorative borders, filling, lettering
Chain stitch creates a series of linked loops that form a bold, decorative line.
- Bring your needle up at your starting point (A).
- Push the needle back down at A (the same hole), but do not pull all the way through. Leave a loop of thread on the surface.
- Bring your needle up one stitch length ahead (B), inside the loop.
- Pull the thread until the loop sits snugly around the emerging thread.
- Push the needle back down at B (inside the loop), leaving another loop.
- Come up one stitch length ahead, inside the new loop, and repeat.
Tips: Do not pull the loops too tight, or you will lose the characteristic rounded shape. Chain stitch can also fill areas by working rows side by side. To end a chain, anchor the last loop with a tiny stitch over it.
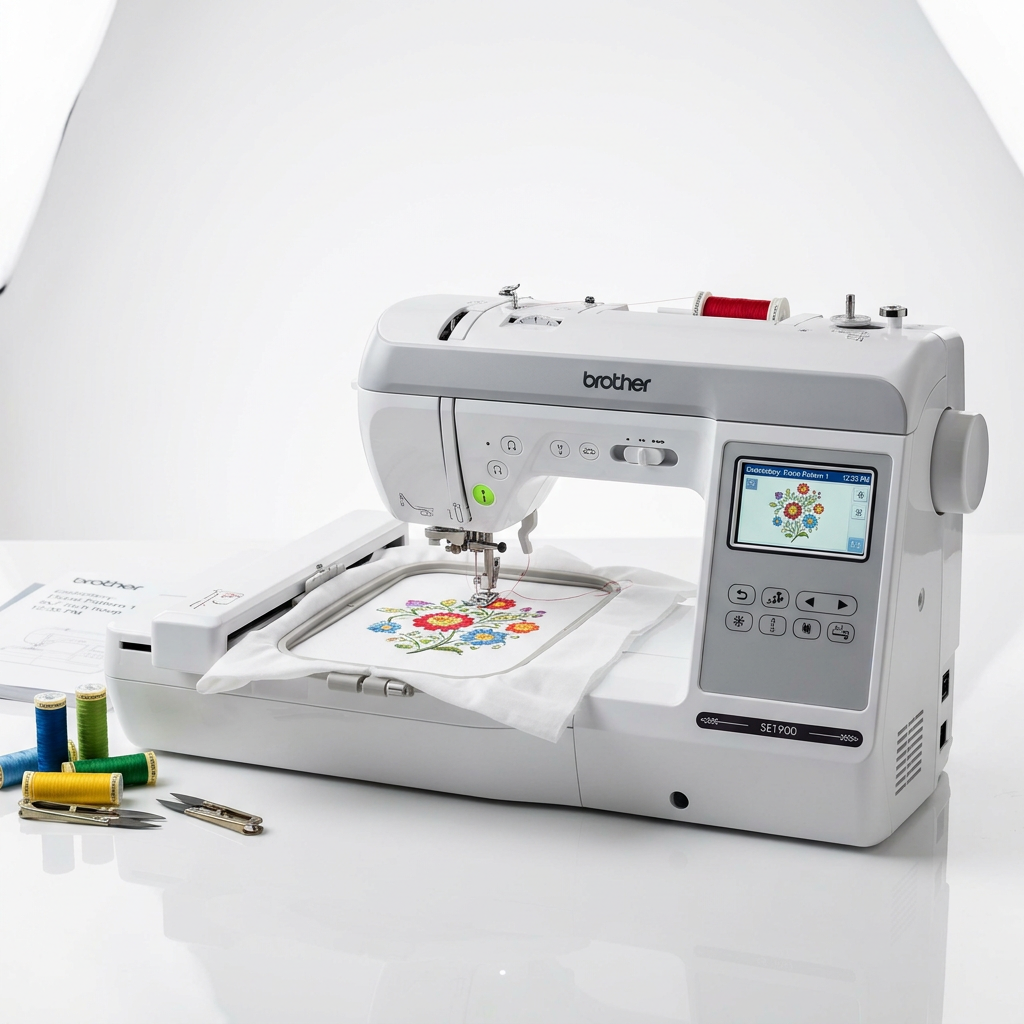
- 5×7 embroidery field
- 138 built-in designs
- LCD touchscreen display
Fill Stitches
Fill stitches cover areas with solid color or texture. They transform outlines into fully realized designs.
6. Satin Stitch
Difficulty: Moderate | Best for: Small to medium shapes, petals, leaves, letters
Satin stitch fills shapes with smooth, parallel straight stitches placed side by side.
- Bring your needle up on one edge of the shape (A).
- Carry the thread across and push down on the opposite edge (B).
- Come back up right next to point A, as close as possible without overlapping.
- Go back down right next to point B on the opposite edge.
- Continue filling the shape with these parallel stitches until covered.
Tips: Keep stitches parallel and tension even. If the fabric puckers, you are pulling too tight. For shapes wider than about 1cm, consider long-and-short stitch instead, as very long satin stitches tend to snag and look loose. Outlining the shape with split stitch first creates a raised edge that makes satin stitch look professional.
7. Long and Short Stitch
Difficulty: Moderate-Advanced | Best for: Large fills, color blending, shading, realistic effects
Long and short stitch is the go-to technique for filling larger areas and creating color gradients.
- Start at the edge of the shape with a row of alternating long and short straight stitches, all pointing toward the center of the shape.
- For the second row, bring your needle up slightly overlapping the ends of the first row, splitting into the existing stitches.
- Make this row all the same length, filling the gaps left by the alternating lengths above.
- Continue with additional rows until the shape is filled.
- To blend colors, switch floss color between rows for a gradient effect.
Tips: Only the first row uses alternating lengths. Subsequent rows use consistent stitch lengths. The “splitting into” technique from the row above is what creates smooth blending. This stitch takes practice, but even imperfect attempts look good from a normal viewing distance.
8. Seed Stitch
Difficulty: Easy | Best for: Light texture fill, backgrounds, scattered coverage
Seed stitch (also called rice stitch) fills areas with small, randomly scattered straight stitches.
- Bring your needle up anywhere within the fill area.
- Make a tiny straight stitch (2-3mm) in any direction.
- Come up at another random spot nearby.
- Make another tiny stitch in a different direction.
- Continue scattering stitches until the area has the desired density.
Tips: Vary the angle of each stitch for a natural, organic appearance. Denser scattering creates more solid coverage, while sparse scattering creates a light, airy fill. This is one of the most forgiving fill stitches because irregularity is part of the charm. Understanding 15 essential embroidery stitches for is key to a great craft hobby.
Decorative and Textural Stitches
These stitches add dimension, texture, and special effects to your embroidery.
9. French Knot
Difficulty: Moderate | Best for: Dots, flower centers, eyes, textured fills, scattered accents
French knots are small, raised dots that add wonderful dimension and detail.
- Bring your needle up through the fabric at the desired position.
- Hold the thread taut with your non-dominant hand, about 2 inches from the fabric surface.
- Wrap the thread around the needle twice (for a standard knot).
- While keeping tension on the wraps, push the needle back down very close to (but not in the exact same hole as) where it came up.
- Continue holding tension on the thread as you slowly pull the needle through to the back.
Tips: The secret to French knots is maintaining tension throughout the entire process. If you let go of the tension before the needle is all the way through, the knot will be messy or pull through entirely. For larger knots, use more strands of floss rather than more wraps.
10. Lazy Daisy (Detached Chain Stitch)
Difficulty: Easy | Best for: Flower petals, leaves, decorative accents
Lazy daisy is a single chain stitch anchored with a small tacking stitch. Arranged in a circle, these make charming simple flowers.
- Bring your needle up at the base of the petal (A).
- Push the needle back down at A (same hole), leaving a loop on the surface.
- Bring the needle up at the tip of the petal (B), inside the loop.
- Pull until the loop forms a teardrop shape of the desired size.
- Anchor the loop by pushing the needle back down just outside the loop at point B.
Tips: For a daisy flower, make 5 to 8 petals radiating from a central point, then add a French knot in the center. Lazy daisy petals can be any length. For leaves, a single longer lazy daisy with a stem stitch vein looks lovely.
11. Woven Wheel (Woven Rose)
Difficulty: Moderate | Best for: Dimensional roses, circular decorative elements
Woven wheel creates stunning, raised roses that look far more impressive than they are to make.
- Create a base of 5 straight stitches radiating from a center point, like a star or asterisk. You must use an odd number of spokes.
- Bring your needle up near the center, between two spokes.
- Weave the needle over one spoke, then under the next, alternating over and under as you spiral outward.
- Do not pierce the fabric during weaving. The needle passes only over and under the spokes.
- Continue weaving until the spokes are covered and the rose is the desired size.
- Push the needle down through the fabric at the edge when complete.
Tips: The odd number of spokes is crucial. With an even number, the over-under pattern does not alternate between rounds. Pull gently as you weave. Loose tension creates a full, puffy rose, while tighter tension creates a flatter, more defined circle.
12. Couching
Difficulty: Easy | Best for: Bold lines, metallic threads, thick yarns, decorative outlines
Couching involves laying a thread on the fabric surface and tacking it down with small stitches from a second thread.
- Bring the laid thread (the thick or decorative one) up through the fabric at your starting point. Lay it along your design line.
- Thread a second needle with a finer thread in a matching or contrasting color.
- Bring the tacking thread up on one side of the laid thread.
- Cross over the laid thread and push down on the other side, creating a small stitch that holds the laid thread in place.
- Space these tacking stitches evenly (every 5-8mm) along the laid thread.
- At the end, push the laid thread through to the back and secure it.
Tips: Couching is the best way to use threads that are too thick or delicate to stitch through fabric repeatedly, including metallic threads, ribbons, and yarn. It also creates beautifully bold lines for outlining.
13. Blanket Stitch
Difficulty: Easy | Best for: Edges, borders, applique, decorative outlines When it comes to 15 essential embroidery stitches for, preparation matters most.
Blanket stitch creates a looped edge that is both decorative and functional.
- Bring your needle up on the baseline (A).
- Push the needle down above the baseline (B), one stitch length to the right.
- Bring the needle up on the baseline directly below B (C), catching the thread under the needle as it emerges.
- Pull through to form a looped edge along the baseline.
- Repeat: up at the next position, catching the thread under the needle each time.
Tips: Keep the height of vertical stitches consistent and the spacing even. Blanket stitch works beautifully around the edge of applique shapes, along borders, or as a decorative element in its own right. Vary the height of stitches for a decorative wave effect.
14. Fly Stitch
Difficulty: Easy | Best for: Leaves, birds, scattered fills, nature motifs
Fly stitch creates a V or Y shape that is incredibly versatile.
- Bring your needle up at the upper left (A).
- Push down at the upper right (B), leaving a loop of thread on the surface.
- Bring the needle up at the bottom center (C), inside the loop.
- Pull to form a V shape.
- Anchor the V by pushing the needle down just below point C.
Tips: The length of the anchoring stitch changes the character. A short anchor creates a V, while a long anchor creates a Y. Stacked fly stitches make excellent fern or feather shapes. Scattered individual fly stitches resemble birds in the distance.
15. Fishbone Stitch
Difficulty: Moderate | Best for: Leaves, feathers, elongated shapes with a central vein
Fishbone stitch fills leaf shapes with overlapping angled stitches that create a natural central vein.
- Make a small straight stitch from the tip of the leaf down the center line (A to B).
- Bring the needle up on the left edge, just below the tip (C).
- Push down just to the right of the center line, slightly below point B (D). This stitch crosses the center.
- Come up on the right edge, slightly below the left stitch (E).
- Push down just to the left of the center line, crossing over the previous stitch (F).
- Continue alternating left and right, with each stitch slightly overlapping at the center, until the leaf is filled.
Tips: The overlapping center creates a natural-looking vein without any additional stitching. Keep the angle of stitches consistent on each side for the most realistic leaf appearance. This stitch works best for elongated, pointed shapes.
Stitch Reference Chart
| Stitch | Type | Difficulty | Strands | Primary Use |
|---|---|---|---|---|
| Running | Line | Easiest | 1-3 | Borders, simple lines |
| Back | Line | Easy | 1-3 | Outlines, lettering |
| Stem | Line | Easy | 2-3 | Curves, stems, vines |
| Split | Line | Easy | 2-4 (even) | Fine outlines, padding |
| Chain | Line | Easy-Mod | 2-4 | Bold outlines, borders |
| Satin | Fill | Moderate | 2-4 | Small shape fills |
| Long & Short | Fill | Mod-Adv | 2-3 | Large fills, shading |
| Seed | Fill | Easy | 1-2 | Light texture fills |
| French Knot | Texture | Moderate | 2-6 | Dots, centers, texture |
| Lazy Daisy | Texture | Easy | 2-3 | Petals, leaves |
| Woven Wheel | Texture | Moderate | 2-3 | Dimensional roses |
| Couching | Texture | Easy | Varies | Bold lines, metallic thread |
| Blanket | Edge | Easy | 2-3 | Borders, applique edges |
| Fly | Texture | Easy | 2-3 | Leaves, birds, ferns |
| Fishbone | Fill | Moderate | 2-3 | Leaves, feathers |
According to the Embroiderers’ Guild, the art of hand embroidery encompasses hundreds of stitch variations, but these fundamental techniques form the building blocks for virtually all of them. Mastering even half of the stitches on this list gives you the tools to complete most beginner and intermediate patterns with confidence.

- ALL-IN-ONE EMBROIDERY KIT: 3 pre-printed “Enjoy Your Life” floral practice fabri
- BEGINNER-FRIENDLY: Includes 33 essential stitch diagrams + HD video tutorials; M
- ELEGANT GIFT PACKAGING: Comes with a premium rigid gift box to keep floss neatly
Practice Tips for Building Stitch Confidence
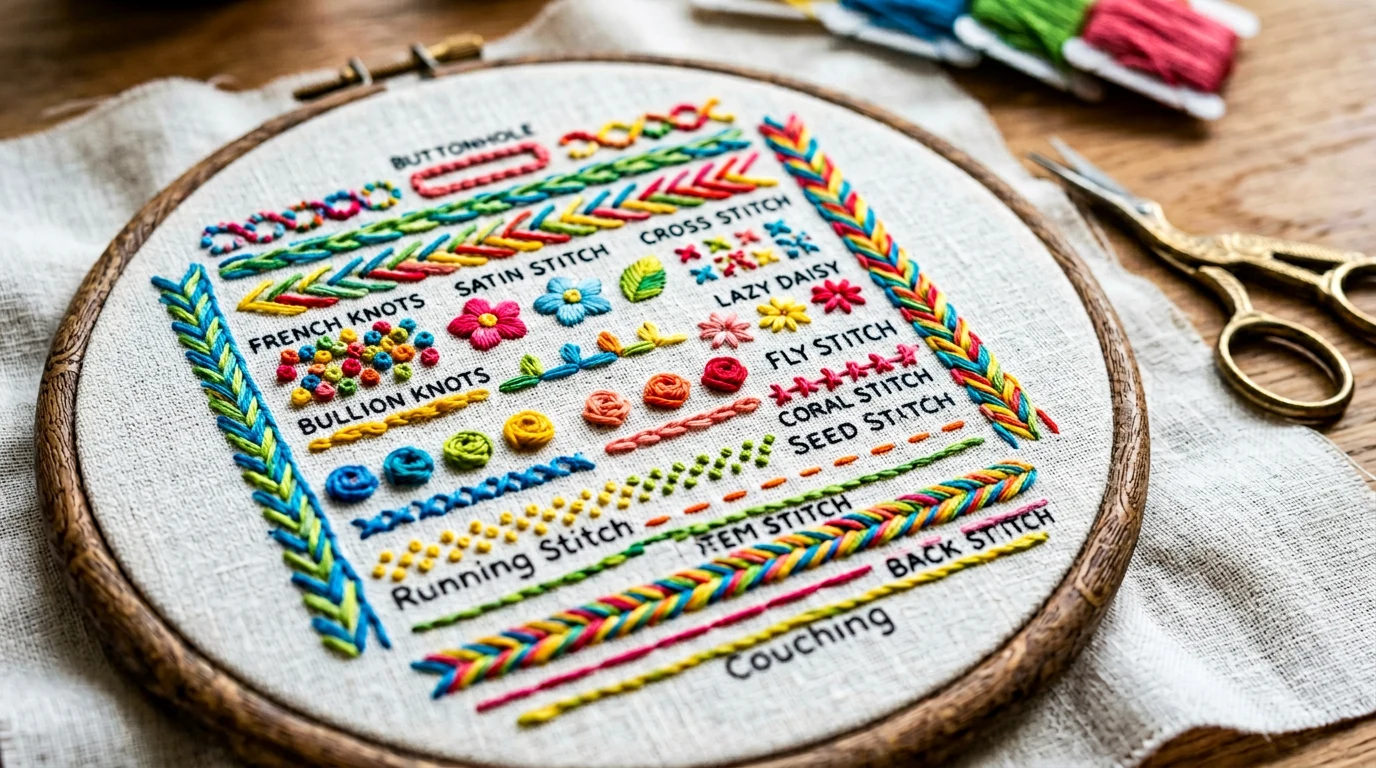
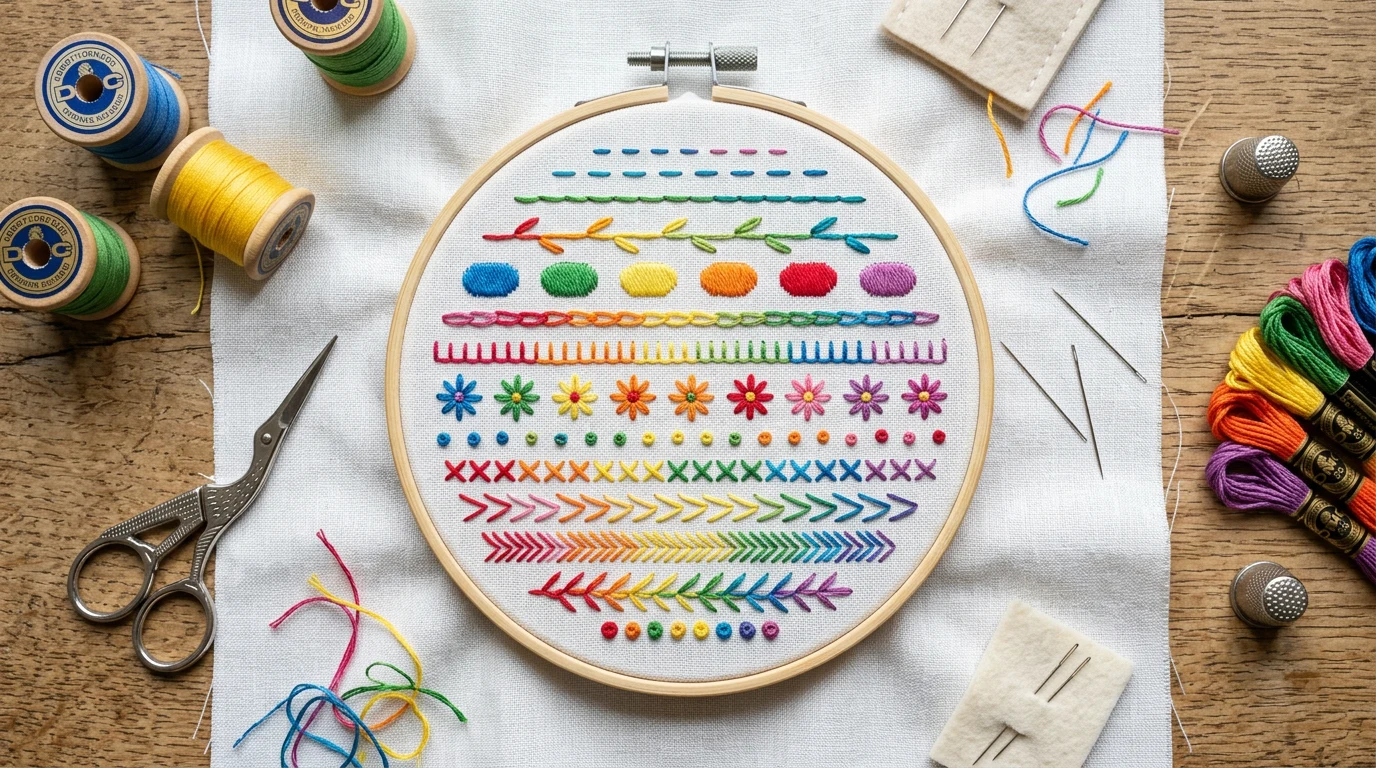
- Create a stitch sampler. Practice all 15 stitches on one piece of fabric for a reference piece you can consult on future projects.
- Practice on marked lines first. Draw guidelines with a water-soluble marker before stitching freehand.
- Focus on consistency, not speed. Even stitches look better than fast stitches every time.
- Use the right strand count. Too many strands make stitches bulky, too few make them invisible.
- Do not be afraid to unpick. Removing stitches and redoing them is part of learning, not a failure.
Frequently Asked Questions
What are the most important embroidery stitches to learn first?
Back stitch, satin stitch, and French knots are the three most essential stitches that appear in the widest range of patterns. If you learn only three stitches, make it these. Adding stem stitch and lazy daisy rounds out a core skill set that covers most beginner projects.
How do I keep my stitches even?
Even stitches come from consistent tension and deliberate stitch length. Practice making stitches of a uniform size by counting fabric threads if you are working on an even-weave fabric, or by marking stitch length guidelines with a water-soluble marker. Speed is the enemy of evenness for beginners, so slow down and focus on consistency.
Why does my thread keep tangling?
Thread tangling usually comes from using too long a piece of floss (keep it under 18 inches), not separating and recombining strands before threading (this step removes the twist), or pulling stitches in the wrong direction. Let your needle dangle freely every few stitches to untwist the thread.
What is the difference between a crewel needle and a tapestry needle?
Crewel (embroidery) needles have a sharp point for piercing tightly woven fabric. Tapestry needles have a blunt, rounded tip designed for counted work on even-weave fabric where you stitch between threads rather than through them. For the stitches in this guide, you want crewel needles.
Can I mix different types of stitches in one project?
Absolutely, and you should. Most embroidery patterns use multiple stitch types together. A typical floral design might use stem stitch for stems, satin stitch for petals, French knots for centers, and back stitch for outlines. Combining stitches is what gives embroidery its richness and visual interest.
Frequently Asked Questions
Do I really need to learn all 15 embroidery stitches before starting my first project?
No, you don’t need to master all 15 stitches right away. A solid repertoire of these fundamental stitches covers the vast majority of patterns and gives you the flexibility to tackle almost any design. You can work through them in order or jump to whichever stitch your current project requires.
What materials and fabric setup do I need to practice these embroidery stitches?
You’ll need cotton fabric secured in a 6-inch or 7-inch hoop with good tension, two strands of contrasting embroidery floss cut to about 18 inches, and a water-soluble marker to draw practice guides. Dark thread on light fabric is easiest to see as you’re learning, and the practice lines help you stitch along each technique accurately.
What is the running stitch and what can I use it for?
The running stitch is the easiest embroidery stitch to learn and creates an evenly spaced dashed line. It’s best used for borders, simple outlines, and decorative dashes, and it’s the perfect place to start as a beginner since it forms the foundation for many other techniques.
Can I load multiple stitches onto my needle at once to work faster?
Yes, according to the guide, you can “load” multiple stitches onto your needle at once by weaving it in and out of the fabric, which can help you work more efficiently as you gain confidence with your technique.