If you want to know about how to set up a, this guide covers everything you need. You don’t need a Pinterest-perfect craft room to start creating. Some of the most productive crafters work from a kitchen table, a closet-turned-workspace, or a single shelf in a shared room. What matters isn’t the size of your space or the amount you spend on it. What matters is that your supplies are organized, accessible, and that you have a surface to work on.
This guide covers craft room setup at every budget level, from $0 (seriously) to full dedicated room renovations. Whatever your living situation, there’s a setup here that works.
The Only Three Things You Actually Need: How To Set Up A
Before we get into specific setups, let’s strip this down to essentials. A functional craft space needs exactly three things.
A work surface. This could be a dedicated table, a fold-out desk, a lap desk, or your kitchen counter. It just needs to be clean, flat, and big enough for your current project.
Supply storage. Your materials need a home. Whether that’s a rolling cart, a cabinet, a tote bag, or a set of clear bins doesn’t matter. What matters is that you can find what you need without a 20-minute scavenger hunt.
Good lighting. This is the one element people consistently underestimate. Poor lighting causes eye strain, headaches, and mistakes in your work. A bright, adjustable task lamp near your work surface makes every craft more enjoyable and every project turn out better.
The $0 Setup: Work with What You Have
Starting a craft hobby should never be blocked by budget. Here’s how to create a functional craft space without spending anything.
Work surface: Your kitchen or dining table. Clear it off after meals, lay down a placemat or old towel as your craft mat, and work there. When you’re done, pack your project into a bag or box and return the table to its day job.
Storage: Repurpose containers you already have. Shoeboxes store yarn beautifully. Mason jars hold buttons, beads, and pins. Ziplock bags keep embroidery floss organized by color. A tote bag or backpack becomes your portable project kit.
Lighting: Sit near a window during daytime crafting. For evening work, move a desk lamp or bright floor lamp from another room to your table.
This setup works perfectly for portable crafts like knitting, crochet, embroidery, and cross-stitch. The key is having a consistent “pack up” routine so your supplies don’t slowly colonize every flat surface in your home.
The Under-$50 Setup: The Dedicated Craft Cart
The three-tier rolling cart is the unofficial mascot of small-space crafting, and for good reason. It’s affordable, portable, compact, and organizes an impressive amount of supplies in a small footprint.
What to buy: A three-tier utility cart ($25-35 at most home goods stores or online), a small clip-on LED task light ($10-15), and a few small containers or zip bags for the cart’s tiers ($5-10 from a dollar store). Mastering how to set up a takes practice but delivers great results.
How to organize it: Top tier holds your current project and most-used tools. Middle tier stores backup supplies (extra yarn, additional thread colors, reference books). Bottom tier holds finished projects and supplies waiting for their next use.
The beauty of a craft cart is mobility. Roll it to your couch for evening crafting. Park it by a window for natural light. Tuck it into a closet when guests come over. It takes up roughly 18 by 12 inches of floor space, which fits in even the smallest studio apartment.
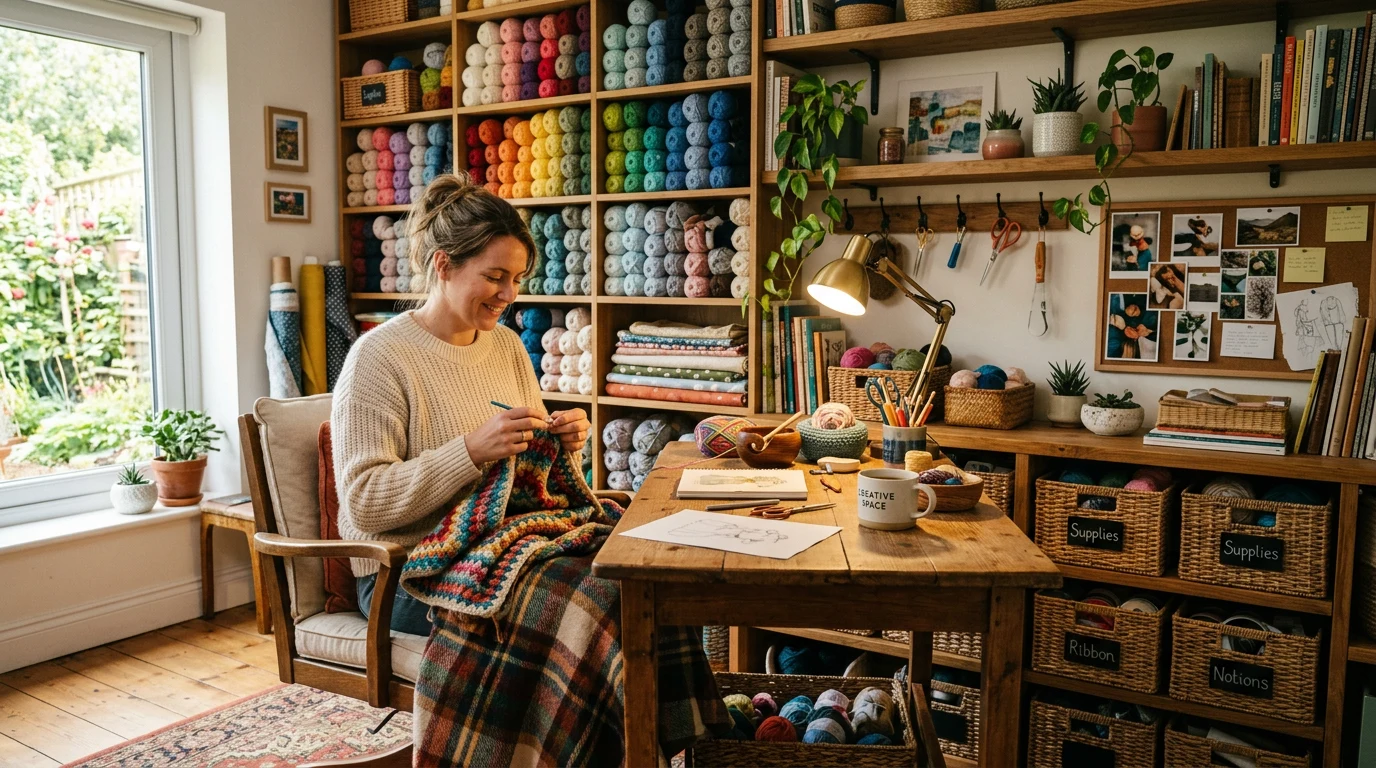
The $50-150 Setup: The Craft Corner
If you can dedicate a permanent corner of a room to crafting, even a 3-by-3-foot area, you unlock a significant quality-of-life upgrade: the ability to leave your project set up between sessions.
The foundation: A small desk or table. This doesn’t need to be a craft-specific piece. A simple folding table ($30-40), a thrift store desk ($15-40), or even a wall-mounted drop-leaf table ($40-60) all work. The wall-mounted option is especially clever for tiny spaces since it folds flat when not in use.
Wall storage: The space above your desk is free real estate. A pegboard ($15-25) with hooks holds scissors, rulers, and tools visibly and accessibly. Floating shelves ($10-20 each) display yarn, fabric, or supply jars while doubling as decor. A magnetic strip ($8) holds needles and pins.
Seating: If you don’t already have a comfortable chair, a basic stool or a secondhand office chair ($20-40 at thrift stores) works. For crafts like knitting or crochet where you might prefer a softer seat, an existing couch or armchair plus a good lap desk is perfectly fine.
Lighting: An adjustable desk lamp with a daylight bulb ($20-35) is the single best investment in this price range. Daylight-spectrum bulbs (5000-6500K) show true colors and reduce eye strain dramatically compared to warm ambient lighting.

- PHOTO STORAGE: Each case holds up to 100 4×6-inch photographs with 16 clear comp
- MULTI-PURPOSE: Perfect for organizing photos, craft supplies, scrapbooking items
- DURABLE PROTECTION: Constructed with crack-resistant polypropylene plastic for l
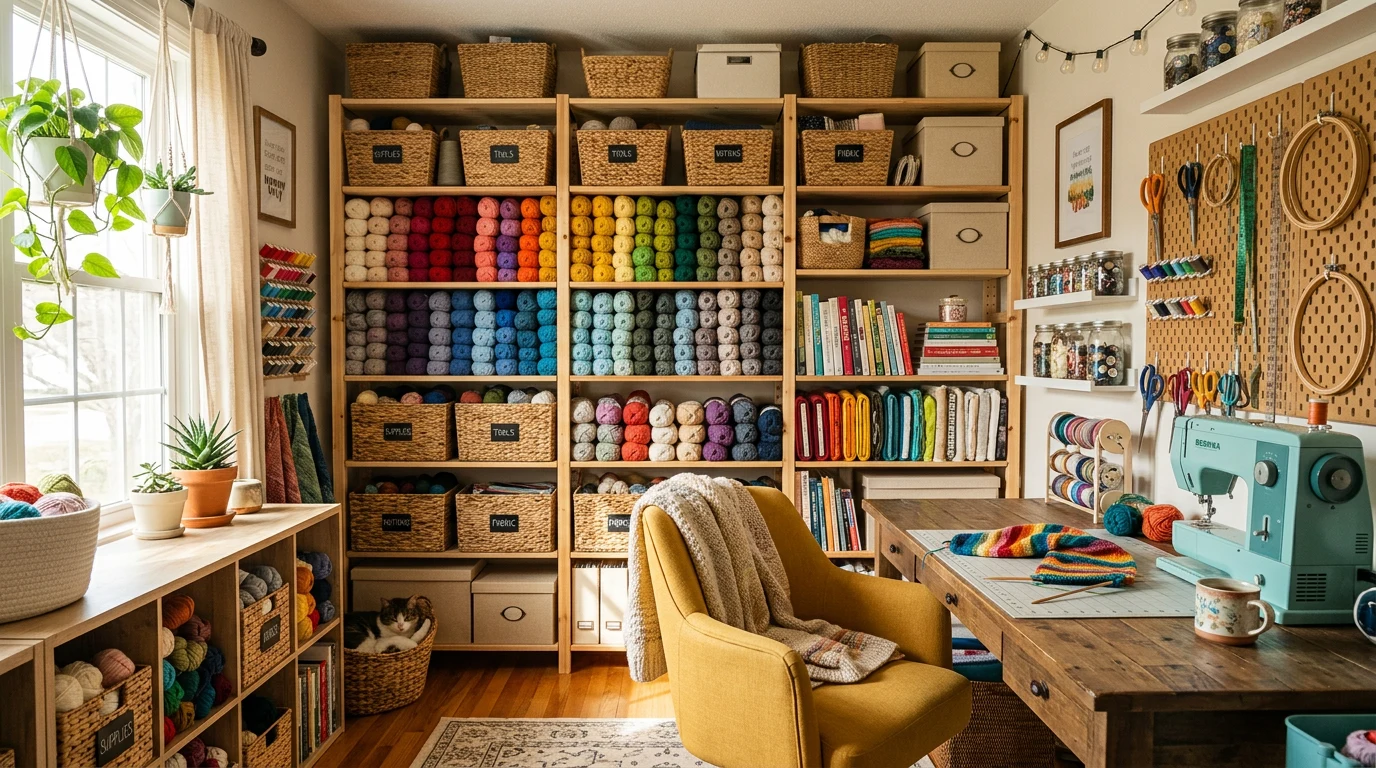
The $150-500 Setup: The Dedicated Craft Space
With this budget, you can create a genuinely comfortable, well-organized craft area. This level suits crafters who’ve committed to their hobby and want a space that supports longer creative sessions.
The Desk
A proper craft table with a larger surface area (at least 30 by 48 inches) gives you room to spread out. Look for tables with adjustable height if you switch between sitting and standing, or if you do crafts that benefit from different working heights. An L-shaped desk provides even more surface area and lets you keep your sewing machine or other equipment set up permanently on one side.
Storage System
At this budget, you can invest in a real storage system. The IKEA Kallax shelving unit ($50-120 depending on size) is a crafter’s best friend because it accepts bins, baskets, and drawers in its cube openings. Each cube can be dedicated to a specific supply type. Clear bins let you see contents at a glance. Fabric bins with labels keep things tidy.
For yarn storage specifically, cube organizers with open-front bins let you pull yarn without untangling your stash. For fabric, comic book boards ($15 for a pack) turn messy fabric piles into neatly folded, visible stacks.
Comfort Upgrades
A quality task chair ($80-150) with good lumbar support prevents the back pain that comes from long crafting sessions. An anti-fatigue mat ($20-30) helps if you stand at a cutting table. A Bluetooth speaker ($20-30) for podcasts or music while you work adds to the enjoyment without taking up valuable desk space.
Storage Solutions by Craft Type
Different crafts have different storage needs. Here’s what works best for the most popular crafts. Understanding how to set up a is key to a great craft hobby.
| Craft | Key Storage Needs | Best Solutions |
|---|---|---|
| Knitting/Crochet | Yarn (bulky), needles/hooks, patterns | Open cube shelves, needle cases, pattern binder |
| Embroidery | Floss (many colors), hoops, fabric | Floss organizer boxes, hoop wall display, fabric drawer |
| Sewing/Quilting | Fabric (flat), thread, notions, patterns | Comic board folding, thread rack, clear drawer units |
| Paper Crafts | Paper (flat), stamps, inks, die cuts | Vertical paper organizer, stamp storage cases, ink pad rack |
| Jewelry Making | Small beads/findings, wire, tools | Compartment boxes, bead organizers, tool roll |
| Painting | Paints, brushes, canvases, palettes | Paint caddy, brush holders, canvas rack or shelf |
Small Space Solutions That Actually Work
Living in a studio apartment or sharing a room doesn’t mean you can’t craft. These solutions have been tested by real small-space crafters.
The closet conversion. A standard closet (24 inches deep, 36 inches wide) can become a complete craft station. Remove the closet rod, install shelves and a small fold-down desk at the back wall, add a task light, and you have a craft nook that disappears behind closed doors. Total cost: $40-100 in hardware.
The over-door organizer. A clear, shoe-style over-door organizer ($10-15) holds an enormous number of small craft supplies. Scissors, markers, tape, glue, embroidery floss, buttons, and small tools all fit in the pockets and stay visible. Hang it on the back of any door.
The craft-in-a-box. A large lidded storage box (like the 66-quart Sterilite containers available everywhere for under $10) holds an entire craft’s worth of supplies. Keep one box per craft. Pull it out when you want to work, put it back when you’re done. Stack multiple boxes in a closet or under a bed.
The murphy desk. Wall-mounted fold-down desks ($40-80) provide a full-size work surface when open and take up zero floor space when closed. Mount one anywhere you have a blank wall section. Pair with floating shelves above for supply storage.
Lighting: The Most Underrated Element
According to the American Optometric Association, proper task lighting reduces eye strain by up to 60% during detail work. For crafting, where you’re often working with small stitches, tiny beads, or color-matching threads, lighting quality makes a dramatic difference in both comfort and accuracy.
Daylight bulbs (5000-6500K) are essential for any craft involving color. Standard warm bulbs (2700K) distort colors, making it impossible to accurately match thread to fabric or choose complementary yarn colors. Swap your craft area bulbs for daylight spectrum and everything looks clearer.
Adjustable arm lamps let you direct light exactly where you need it. For detail work, position the light 12-18 inches from your work surface at a slight angle to minimize shadow from your hands.
Magnifying lamps ($30-60) combine light with magnification, which is genuinely life-changing for embroidery, cross-stitch, and any small-scale work. Even if your vision is fine, magnification reduces fatigue during long sessions.

- 【SEWING CUTTING MAT】Aneuzs self-healing cutting mat protects your work surface.
- 【SELF HEALING CUTTING MAT】Made of 5-layer PVC material, the white hardness PVC i
- 【ROTARY MAT SIZE】Rotary cutting mat measures approx.12 x 18 inches (A3 size), du
Organization Systems That Stick
The best organization system is the one you’ll actually maintain. Elaborate Pinterest-worthy systems that take 30 minutes to put away after each session won’t last. Here are principles that work long-term.
One-motion access. If it takes more than one motion to access a supply (open a door, pull out a drawer, open a box), you’ll eventually stop putting it back. Prioritize open storage for frequently used items and closed storage for rarely used supplies.
Category over project. Organize by supply type (all yarn together, all needles together) rather than by project, unless you’re actively working on specific projects. Category-based organization scales better as your collection grows. When it comes to how to set up a, preparation matters most.
Visible supplies. Clear bins, open shelves, and color-organized displays serve double duty: they keep supplies findable and make your craft space look intentional and inviting. A wall of organized yarn is beautiful. A closet of mystery bags is stressful.
Declutter regularly. Every six months, go through your supplies. Donate or gift materials for crafts you’ve moved on from. Use up small quantities of leftover supplies in scrap projects. A tidy craft space with only things you love and use is infinitely more inspiring than a cluttered one with everything you’ve ever bought.
Budget-Friendly Shopping Tips
Before buying anything new for your craft space, check these sources.
Thrift stores and estate sales. Tables, shelving, chairs, lamps, and storage containers are abundant at thrift stores for a fraction of retail. Estate sales often have excellent craft furniture from dedicated crafters who invested in quality pieces.
Facebook Marketplace and Buy Nothing groups. Free and deeply discounted furniture appears daily. Search for “craft table,” “shelving unit,” “desk,” and “storage.” Buy Nothing groups in particular are goldmines for craft supplies and furniture.
Dollar stores. Containers, baskets, organizer bins, label makers, and basic craft tools are all available for $1-5 at dollar stores. The quality is fine for storage purposes.
IKEA hacks. The IKEA craft community has documented hundreds of ways to repurpose affordable IKEA pieces for craft storage. The Kallax, Raskog cart, and Alex drawer unit are the most popular bases for craft room hacks.
Frequently Asked Questions
How much space do I need for a craft area?
You can create a functional craft space in as little as 2 by 2 feet (a small desk or fold-down table). For a more comfortable setup with storage, 4 by 6 feet is ideal. A full dedicated craft room of 8 by 10 feet or larger is luxurious but absolutely not necessary. Many prolific crafters work from a single corner of their living room or bedroom with just a small table and a rolling cart.
What is the most important thing in a craft room?
Good lighting. It consistently tops the list of “things I wish I’d prioritized sooner” among experienced crafters. A quality daylight-spectrum task lamp ($20-35) makes more difference to your crafting experience than any piece of furniture or storage system. It reduces eye strain, shows true colors, and makes detail work significantly easier and more enjoyable.
How do I organize craft supplies in a shared space?
Use portable, self-contained storage that can be put away completely when not in use. A rolling cart, a set of stacking bins, or a single large container that holds everything works well. The key is having a system where cleanup takes under 5 minutes. Wall-mounted options like pegboards or floating shelves can also work in shared spaces since they don’t take up floor area that others need.
Should I buy a craft-specific desk or use a regular table?
A regular table works perfectly well for most crafts. Craft-specific desks often come with premium price tags for features you may not need (like adjustable tilt surfaces for drawing or built-in thread holders). The main exceptions are sewing, which benefits from a table at a specific height for machine work, and cutting, which benefits from a higher surface to reduce back strain. For everything else, any sturdy, flat surface at a comfortable height is sufficient.
How do I stop my craft supplies from taking over my entire house?
Set physical boundaries. Decide that your craft supplies live in one specific area (a shelf, a closet, a cart, a room) and resist the urge to expand beyond it. When the space is full, use something before buying something new. Do a supply audit every six months and donate materials for crafts you no longer do. The “one in, one out” rule works well for supply-prone crafters: for every new item that comes in, one leaves.
Frequently Asked Questions
Do I really need to spend a lot of money to set up a craft room?
No, you can create a functional craft space on any budget, even starting with $0. The article shows that what matters most is having an organized work surface, accessible storage, and good lighting, not how much you spend or the size of your space.
What are the three essential things I need for a craft room?
You need a work surface (like a kitchen table or lap desk), supply storage (such as containers or bins to organize materials), and good lighting with an adjustable task lamp. These three elements are what make any craft space functional and enjoyable.
How can I set up a craft room on any budget if I don’t have much space?
You can use small spaces like a kitchen corner, a shelf in a shared room, or even a closet by repurposing items you already have for storage. The key is keeping your supplies organized and accessible so you can work efficiently in whatever space is available.
What household items can I use for craft storage instead of buying new supplies?
You can repurpose shoeboxes for yarn, mason jars for buttons and beads, and other containers you already own at home. This approach lets you get started with your craft hobby without any additional expense while keeping materials organized and easy to find.
