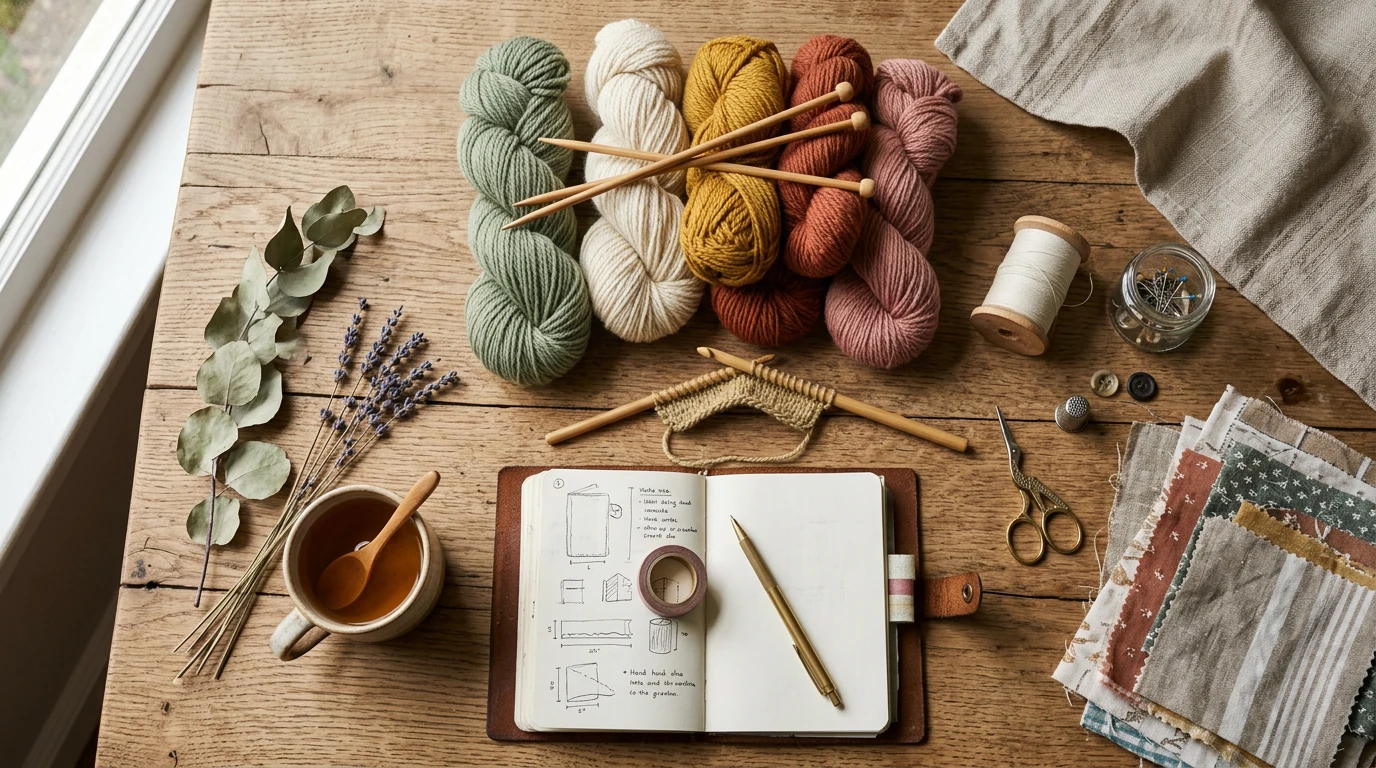
There’s something magical about creating your own soap from scratch – the satisfying process of watching simple ingredients transform into beautiful, fragrant bars that nourish your skin. Soap making for beginners might seem intimidating at first, but it’s actually one of the most approachable and rewarding crafts you can start at any age. Whether you’re looking for a new creative outlet or want to make personalized gifts for family and friends, this comprehensive guide will walk you through everything you need to know to begin your soap making journey.
Our reviews are based on aggregated verified buyer feedback, manufacturer specifications, and published expert opinion. Products are not independently tested by our team.
Why Soap Making Is a Rewarding Craft
Soap making offers numerous benefits that make it particularly appealing to those seeking a meaningful hobby. First and foremost, you gain complete control over what goes into your soap, allowing you to avoid harsh chemicals and synthetic additives commonly found in commercial products. This is especially valuable if you have sensitive skin or prefer natural ingredients.
The creative possibilities are endless when you make your own soap. You can experiment with colors, fragrances, textures, and designs to create bars that reflect your personal style. From rustic oatmeal and honey soaps to elegant lavender and shea butter creations, each batch becomes a unique expression of your creativity.
Beyond the personal satisfaction, handmade soaps make wonderful gifts that friends and family truly appreciate. There’s something special about receiving a thoughtfully crafted bar of soap that someone made with their own hands. Many soap makers find that their hobby eventually grows into a small business, selling their creations at farmers markets, craft fairs, or online.
The meditative nature of soap making provides stress relief and a sense of accomplishment. The process requires focus and attention to detail, which helps quiet a busy mind. Watching oils transform through saponification or seeing colorants swirl together creates a deeply satisfying experience that many crafters find addictive in the best possible way.
Melt-and-Pour Method Explained
The melt-and-pour method is the perfect starting point for soap making beginners. This technique uses pre-made soap bases that have already undergone saponification – the chemical process that transforms oils and lye into soap. You simply melt the base, add your desired colors and fragrances, pour into molds, and wait for it to harden.
Bramble Berry melt-and-pour soap base and Stephenson melt-and-pour bases are among the most popular choices for beginners. These bases come in various formulations including glycerin, goat milk, shea butter, and olive oil versions. Each type offers different properties and benefits for your finished soap.
The beauty of melt-and-pour lies in its simplicity and safety. You don’t need to handle caustic lye or worry about precise measurements for saponification. The process is forgiving, making it ideal for those who want immediate results without extensive preparation or safety equipment.
Working with melt-and-pour bases allows you to focus on the creative aspects of soap making – experimenting with colors, fragrances, and decorative elements. You can create layered soaps, embed objects like loofahs or toys, and achieve professional-looking results from your very first attempt.
The main limitation of melt-and-pour is that you’re working with a pre-existing formula. While you can add beneficial ingredients like oils, butters, and botanicals, there’s a limit to how much you can modify the base recipe without affecting the soap’s integrity. However, for beginners, this constraint actually provides helpful boundaries while you learn the craft.
Cold Process Method Explained
Cold process soap making is the traditional method that gives you complete control over your recipe from start to finish. This technique involves combining oils and fats with lye (sodium hydroxide) to create saponification. The process requires more knowledge, precision, and safety precautions than melt-and-pour, but it offers unlimited creative possibilities.
Essential Depot food-grade lye (sodium hydroxide) is a trusted brand among soap makers for its purity and consistency. When working with lye, you’ll measure precise amounts of oils and sodium hydroxide based on saponification values to ensure your soap is properly balanced and safe to use.
The cold process method allows you to choose every ingredient that goes into your soap. You can select specific oils for their properties – coconut oil for cleansing and lather, olive oil for mildness, castor oil for creamy bubbles, and shea butter for moisturizing benefits. This control means you can formulate soaps for different skin types and preferences.
One of the most exciting aspects of cold process soap making is the ability to create intricate designs through techniques like swirling, layering, and piping. Advanced techniques such as the Taiwan swirl or peacock feather design become possible once you master the basics. The soap batter’s consistency and working time allow for artistic expression that’s simply not possible with melt-and-pour.
Cold process soaps require a curing period of 4-6 weeks to reach their optimal hardness and mildness. During this time, excess water evaporates and the soap continues to improve. While this delayed gratification might seem frustrating initially, many soap makers find the anticipation adds to the overall satisfaction of the craft.
According to the Handcrafted Soap and Cosmetic Guild, proper formulation and safety procedures are essential for successful cold process soap making, making education and preparation crucial before attempting your first batch.

- Food-Safe & Premium Silicone: SJ soap mold crafted from soft, flexible, high-gra
- Effortless Release: Simply pour your soap mixture into the molds and let it set.
- Value Pack: Each set includes 3 sturdy silicone molds. Each mold has 6 cavities
Comparing Both Methods
Understanding the key differences between melt-and-pour and cold process methods will help you choose the best starting point for your soap making journey. Each method has distinct advantages and considerations that appeal to different personalities and goals.
| Aspect | Melt-and-Pour | Cold Process |
|---|---|---|
| Time Investment | 1-2 hours per batch | 3-4 hours plus curing time |
| Safety Requirements | Minimal (just hot melted base) | Extensive (lye handling) |
| Initial Cost | Lower startup investment | Higher due to equipment needs |
| Creative Control | Limited to additives and design | Complete recipe formulation |
| Learning Curve | Beginner-friendly | Steeper learning curve |
| Results Timeline | Ready to use in 24 hours | 4-6 weeks curing required |
For absolute beginners, melt-and-pour offers the perfect introduction to soap making concepts without overwhelming complexity. You can learn about different additives, practice working with molds, and develop an understanding of how various ingredients affect the final product. Success comes quickly, building confidence for future projects.
Cold process appeals to crafters who enjoy the scientific aspect of soap making and want complete control over their recipes. If you love researching ingredients, calculating formulations, and don’t mind waiting for results, cold process offers unparalleled creative freedom. The method also tends to be more economical in the long run since you’re not purchasing pre-made bases.
Many experienced soap makers use both methods depending on their project goals. Melt-and-pour is excellent for quick gifts, testing new fragrance combinations, or creating decorative embed soaps. Cold process becomes the go-to method for custom formulations, large batches, and artistic techniques.
Consider your available time, budget, and personality when choosing your starting method. If you’re naturally cautious and prefer to master one thing at a time, begin with melt-and-pour. If you’re comfortable with precise measurements and don’t mind extensive preparation, cold process might be your calling.
Essential Soap Making Supplies
Having the right supplies makes your soap making experience more enjoyable and successful. While each method has specific requirements, some tools are universal to both approaches. Building your supply collection gradually allows you to invest in quality items without overwhelming your budget.
For melt-and-pour soap making, you’ll need a microwave-safe container for melting your base, silicone spatulas for stirring, and molds for shaping your soap. Crafter’s Choice soap molds offer excellent variety and durability, while Mold Market silicone molds provide professional-quality results that release soap easily.
- Digital scale (essential for accurate measurements)
- Heat-resistant measuring cups
- Silicone spatulas and spoons
- Thermometer for monitoring temperatures
- Soap molds in various shapes and sizes
- Cutting tools for trimming finished bars
- Storage containers for supplies and finished soap
- pH strips for testing (cold process only)
Cold process soap making requires additional specialized equipment for safety and precision. Stainless steel or heat-resistant plastic containers are necessary for mixing lye solutions, and you’ll need separate tools dedicated solely to soap making to avoid contamination. For more guidance, The Spruce Crafts provides expert resources on craft tutorials.
- Immersion blender for mixing soap batter
- Safety equipment (goggles, gloves, long sleeves)
- Separate measuring containers for lye and oils
- Wooden or silicone molds for larger batches
- Insulation materials for maintaining temperature
- Cutting guides for uniform bar sizes
Quality suppliers like Wholesale Supplies Plus and Nature’s Garden soap supplies offer starter kits that include essential tools at discounted prices. These kits eliminate guesswork and ensure you have compatible equipment that works well together.
Invest in a accurate digital scale that measures in grams, as precise measurements are crucial for both methods. A scale that weighs to 0.1-gram accuracy will serve you well throughout your soap making journey. Many experienced makers recommend purchasing the best scale you can afford, as it’s the foundation of consistent results.
Organization is key to enjoyable soap making sessions. Dedicate specific containers and tools to your craft, and establish a clean, well-ventilated workspace. Having everything organized and easily accessible makes the process more relaxing and reduces the risk of mistakes.
Understanding Oils and Butters
The oils and butters you choose dramatically impact your soap’s properties, from lather quality to moisturizing ability. Understanding how different ingredients behave helps you create soaps tailored to specific needs and preferences. While melt-and-pour limits your base oil selection, you can still add beneficial oils as additives.
Coconut oil is the powerhouse of soap making, providing abundant lather and cleansing properties. However, too much coconut oil can be drying, so it’s typically balanced with more conditioning oils. Olive oil creates mild, moisturizing soap with a creamy lather, making it excellent for sensitive skin formulations.
Palm oil contributes hardness and stability to soap bars, helping them last longer in the shower. Many soap makers seek sustainably sourced palm oil due to environmental concerns. Castor oil, used in smaller percentages, boosts lather and creates creamy, stable bubbles that enhance the washing experience.
- Coconut Oil: Hard bar, cleansing, abundant lather
- Olive Oil: Mild, conditioning, creamy lather
- Palm Oil: Hardness, longevity, stable lather
- Castor Oil: Lather booster, bubble stability
- Sweet Almond Oil: Gentle, moisturizing
- Avocado Oil: Rich, nourishing properties
- Sunflower Oil: Light, non-comedogenic
Specialty butters like shea, cocoa, and mango add luxurious qualities to handmade soap. Shea butter provides exceptional moisturizing properties and creates a hard, long-lasting bar. Cocoa butter contributes chocolate-like fragrance naturally and adds firmness to the soap structure.
Each oil has a specific saponification value that determines how much lye is needed for complete conversion to soap. Online calculators help you formulate balanced recipes, ensuring your soap is neither too harsh nor too soft. Understanding these values becomes crucial as you advance to cold process methods.
When adding oils to melt-and-pour bases, limit additions to 1-2% of the base weight to maintain the soap’s integrity. Bulk Apothecary essential oils and similar suppliers offer soap-making grade oils that blend well without compromising the base formula.
Quality oils make a noticeable difference in your finished soap. While budget-friendly options exist, investing in good ingredients shows in the final product’s performance and longevity. Many suppliers offer soap-making specific grades that provide optimal results.
Fragrances and Colorants
Adding fragrance and color transforms basic soap into personalized creations that reflect your style and preferences. The key to success lies in choosing appropriate products and understanding usage rates for each type of additive. Quality fragrances and colorants ensure your soap maintains its appeal over time.
Bramble Berry fragrance oils are specifically formulated for soap making and perform reliably in both melt-and-pour and cold process methods. These fragrances are tested for soap compatibility, ensuring they won’t cause acceleration, discoloration, or other unwanted effects in your finished bars.
Essential oils provide natural fragrance but require careful selection since not all essential oils are suitable for soap making. Some can cause skin sensitization or fade quickly in the alkaline soap environment. Popular soap-safe essential oils include lavender, tea tree, peppermint, and sweet orange.
- Fragrance oils: Consistent scent, wide variety, soap-tested
- Essential oils: Natural origin, therapeutic properties, limited selection
- Usage rates: Typically 0.5-2% of total soap weight
- Scent strength: Consider how fragrance performs in finished soap
- Skin safety: Choose body-safe fragrances only
Nurture Soap liquid colorants offer vibrant, consistent colors that work beautifully in both soap making methods. These concentrated colorants blend easily and maintain their color stability over time. Liquid colorants are particularly convenient for beginners since they incorporate smoothly without creating specks or streaks.
Natural colorants include botanicals, clays, and oxides that provide earthy, subtle tones. Turmeric creates golden yellow, spirulina produces green shades, and cocoa powder adds brown tones. While natural colorants can be less predictable than synthetic options, they appeal to crafters seeking completely natural products.
Mica powders create stunning metallic and pearl effects that add sophistication to handmade soap. These minerals are soap-safe and provide intense color payoff with minimal usage. Mica works particularly well in melt-and-pour soap where it can be easily dispersed without clumping.
Color planning becomes important when creating multi-colored soaps or specific design effects. Understanding how colors blend and interact helps you achieve your desired results. Keep detailed notes about your color combinations and usage rates for future reference.
Start with small amounts of colorant and fragrance, gradually increasing until you achieve the desired intensity. It’s much easier to add more than to correct an over-scented or overly colored batch. Test new combinations in small batches before committing to larger productions.

- Must-have soap making accessory: works well for both cp and mp soaps.2 stainless
- Perfect for soap making, 10 slots for cutting the soap equally into 1 inch each.
- It’s not only for soap, but also wonderful for cutting loaf, dessert and pastry,
Step-by-Step: Your First Melt-and-Pour Soap
Creating your first batch of melt-and-pour soap is an exciting milestone that builds confidence for future projects. This detailed walkthrough ensures your success and helps you understand the process thoroughly. Having all supplies ready before starting makes the experience smooth and enjoyable.
Begin by gathering all your supplies: 1 pound of melt-and-pour soap base, fragrance oil of your choice, colorant (optional), silicone molds, a microwave-safe measuring cup, and a silicone spatula. Work in a clean area with good ventilation, especially when using fragrances.
Cut your soap base into small, uniform cubes to ensure even melting. Smaller pieces melt more consistently and reduce the risk of overheating, which can cause the base to become thick and difficult to work with. Place the cubes in your microwave-safe container.
- Microwave the soap base in 30-second intervals, stirring between each heating
- Continue until completely melted but not overheated (around 160°F)
- Allow the base to cool slightly to prevent fragrance evaporation
- Add fragrance oil at 0.5-1% of base weight (0.25-0.5 oz for 1 lb base)
- Stir gently to avoid creating bubbles
- Add colorant drop by drop until desired shade is achieved
Work quickly but calmly once your base is prepared, as melt-and-pour begins to thicken as it cools. Pour the soap into your molds in a steady stream to minimize air bubbles. If bubbles appear on the surface, spritz lightly with rubbing alcohol to break them.
Allow your soap to cool completely before unmolding, typically 2-4 hours depending on the size and thickness of your bars. The soap should feel firm and cool to the touch. Gentle pressure on the back of flexible molds will release your finished soap.
Your finished soap is ready to use immediately, though allowing it to sit for 24 hours helps any remaining moisture evaporate for optimal hardness. Wrap finished bars in plastic wrap or store in airtight containers to prevent moisture absorption.
Don’t be discouraged if your first batch isn’t perfect. Common beginner issues include overheating the base, adding too much fragrance, or creating air bubbles. Each batch teaches valuable lessons that improve your technique and results.
Document your recipe, including the type of base used, fragrance amounts, and colorant quantities. This record-keeping helps you recreate successful batches and avoid repeating mistakes. Photography of your finished soaps creates a visual progress record.
Safety Considerations
Safety should always be your top priority when soap making, regardless of which method you choose. While melt-and-pour is generally safer than cold process, both methods involve materials that require respectful handling and proper precautions. Developing good safety habits from the beginning protects you and ensures enjoyable crafting sessions.
When working with melt-and-pour bases, the primary safety concern is the hot melted soap, which can reach temperatures of 160°F or higher. Always use heat-resistant containers and protect your hands and surfaces from spills. Keep a bowl of cool water nearby for immediate treatment of minor burns.
Cold process soap making involves handling lye, a caustic substance that requires extensive safety measures. Essential safety equipment includes safety goggles, rubber or nitrile gloves, long sleeves, closed-toe shoes, and adequate ventilation. Work in a well-ventilated area away from children and pets.
- Always add lye to water, never water to lye
- Work in a ventilated area to avoid inhaling fumes
- Keep white vinegar nearby to neutralize lye spills
- Have emergency contact information readily available
- Never leave lye solutions unattended
- Store lye safely away from children and pets
- Label all containers clearly
Fragrance oils and essential oils can cause allergic reactions in some people. Always read safety data sheets for any fragrances you use, and test new scents on a small area of skin before using in soap. Some essential oils are not suitable for certain skin conditions or during pregnancy.
Colorants generally pose minimal safety risks, but some people may be sensitive to certain dyes or pigments. Natural colorants like herbs and spices should be properly researched, as not all natural materials are safe for skin contact.
Establish a dedicated workspace for soap making that’s separate from food preparation areas. Use separate utensils and equipment that are never used for cooking to prevent cross-contamination. Clean and store your equipment properly after each use.
Emergency preparedness includes knowing how to handle spills, burns, and accidental contact with caustic materials. Keep a first aid kit in your soap making area and ensure family members know basic emergency procedures if you work alone.
Insurance considerations may apply if you plan to sell your handmade soaps. Check with your homeowner’s or renter’s insurance about coverage for craft-related activities, and consider business insurance if your hobby grows into a commercial venture.
Next Steps: Growing Your Skills
Once you’ve mastered the basics of soap making, a world of advanced techniques and specializations awaits your exploration. The beauty of this craft lies in its unlimited potential for growth and creativity. Each new skill you develop opens doors to more sophisticated projects and artistic expression.
Advanced melt-and-pour techniques include creating layered soaps, embedding objects, making soap within soap designs, and using multiple colors in complex patterns. These techniques require timing and temperature control but produce stunning visual effects that rival professional products.
Transitioning to cold process soap making represents a natural progression for many crafters. Start by taking a class or workshop to learn proper techniques and safety procedures. Online resources and books provide extensive information, but hands-on instruction builds confidence more effectively.
Specialty soap types offer exciting challenges for advancing soap makers. Hot process soap making provides faster results than cold process while still allowing complete recipe control. Liquid soap making creates shampoos, body washes, and hand soaps using different saponification chemistry.
- Advanced swirling techniques for artistic designs
- Natural colorant extraction and preparation
- Custom fragrance blending
- Specialty additives like clays and botanicals
- Professional packaging and labeling
- Recipe formulation and testing
- Market research for potential sales
Joining soap making communities, both online and locally, accelerates your learning and provides troubleshooting support. Experienced soap makers generously share knowledge and encourage newcomers. These connections often lead to lifelong friendships centered around shared passion.
Consider specializing in particular types of soap that align with your interests or market demand. Some makers focus on natural and organic formulations, while others excel at artistic designs or specialty bars for specific skin conditions. Specialization helps you develop expertise and reputation.
Documentation becomes increasingly important as you advance. Keep detailed records of recipes, techniques, supplier sources, and customer feedback if you sell your products. This information becomes invaluable for scaling production and maintaining quality consistency.
The soap making journey is ultimately personal and should reflect your interests, available time, and goals. Whether you remain a hobbyist creating gifts for family and friends or develop a thriving business, the skills and satisfaction you gain will enrich your life in countless ways.
What’s the difference between soap making and glycerin soap making?
Glycerin soap making typically refers to using melt-and-pour bases that contain glycerin, while traditional soap making can refer to cold process methods that create glycerin naturally during saponification. Both methods produce glycerin-containing soap, but melt-and-pour uses pre-made bases while cold process creates soap from scratch using oils and lye.
How long does handmade soap last?
Properly made and stored handmade soap can last 1-2 years or longer. Melt-and-pour soaps typically have a shorter shelf life than cold process soaps due to their higher water content. Factors affecting longevity include ingredients used, storage conditions, and whether preservatives were added. Store soap in cool, dry conditions away from direct sunlight for best results.
Can I use kitchen utensils for soap making?
It’s recommended to use separate utensils dedicated solely to soap making, especially for cold process methods involving lye. Cross-contamination between soap making and food preparation tools can pose health risks. For melt-and-pour soap making, you can use kitchen tools as long as they’re thoroughly cleaned afterward, but dedicated tools are still preferable.
What’s the most beginner-friendly soap base?
Clear glycerin melt-and-pour base is often recommended for beginners because it’s forgiving, easy to work with, and allows you to see your colorants and additives clearly. White glycerin base is also excellent for beginners and provides better color opacity. Both types melt easily, accept fragrances well, and produce consistent results.
How much fragrance should I add to soap?
For melt-and-pour soap, use 0.5-1% fragrance oil by weight of the soap base. For cold process soap, usage rates typically range from 0.5-2% depending on the strength of the fragrance. Always check the manufacturer’s recommended usage rate, as some fragrances are stronger than others. Essential oils generally require higher usage rates than fragrance oils to achieve comparable scent strength.
Do I need insurance to sell handmade soap?
While not legally required in most areas, product liability insurance is highly recommended if you plan to sell handmade soap. This protects you from potential claims related to adverse reactions or product issues. Additionally, check local regulations regarding cosmetic manufacturing, labeling requirements, and business licensing. Requirements vary significantly by location and sales volume.
Frequently Asked Questions
What’s the difference between melt-and-pour and cold process soap making for beginners?
Melt-and-pour is faster and safer since you use pre-made soap bases that you simply melt, color, and pour into molds, making it ideal for beginners. Cold process requires mixing lye with oils and waiting weeks for curing, which involves more complex chemistry but gives you complete control over ingredients from scratch.
Do I need special equipment to start making soap at home?
For melt-and-pour, you’ll need basic items like a microwave or double boiler, soap molds, and a thermometer. Cold process requires more specialized equipment including a scale, safety gear for lye, and dedicated utensils, so beginners often start with melt-and-pour to keep costs and complexity low.
Can I use natural ingredients and fragrances in homemade soap?
Yes, one of the main benefits of making your own soap is controlling the ingredients to avoid harsh chemicals and synthetic additives. You can use essential oils, natural colorants, and ingredients like honey, oatmeal, and shea butter to create soaps tailored to your preferences and skin needs.
How long does it take to make soap and have it ready to use?
Melt-and-pour soap is ready to use within a few hours after pouring and cooling, making it perfect for quick crafting projects. Cold process soap takes 4-6 weeks to cure properly before it’s ready to use, so if you want faster results, melt-and-pour is the better choice for beginners.
