Starting your punch needle journey can feel overwhelming when faced with endless pattern options, but choosing the right easy punch needle patterns will set you up for success and enjoyment. These beginner-friendly designs focus on simple shapes, basic techniques, and achievable goals that build your confidence with each completed project. Whether you’re looking for a quick afternoon project or something special to gift, these patterns offer the perfect introduction to this beloved fiber art.
Our reviews are based on aggregated verified buyer feedback, manufacturer specifications, and published expert opinion. Products are not independently tested by our team.
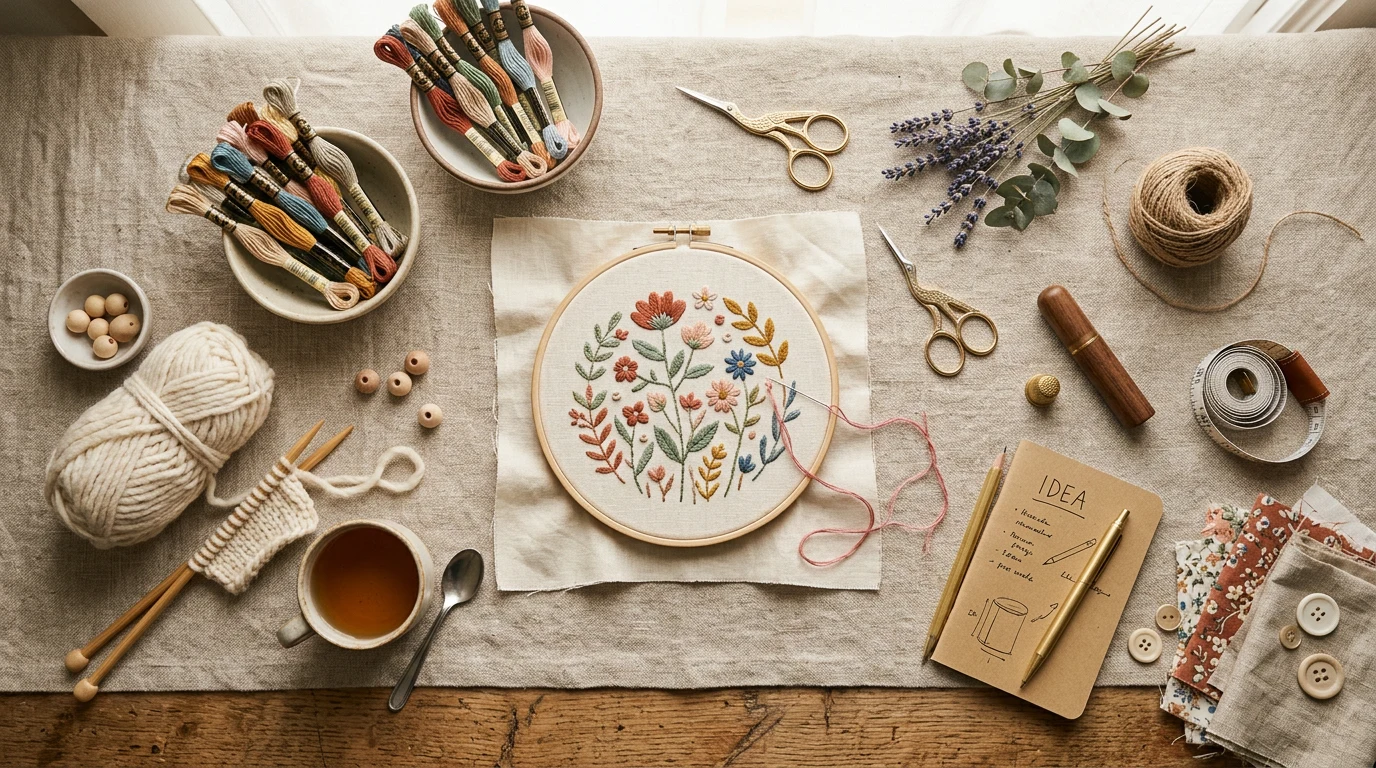
Tips Before Starting Your First Pattern
Before diving into your first project, taking time to understand the basics will save you frustration and ensure beautiful results. The foundation of successful punch needle work lies in proper preparation and realistic expectations for your skill level.
Start with the right tools for your comfort level. The Ultra Punch needle offers adjustable pile height and works well for beginners, while the Oxford Punch Needle #10 (fine) creates delicate work perfect for detailed patterns. Reviews indicate that newcomers often prefer the Ultra Punch for its versatility, though traditionalists appreciate the precision of Amy Oxford’s original design.
Your fabric choice significantly impacts your success. Monks cloth with 12-count weave provides the ideal foundation for most beginner patterns, offering enough structure to hold loops while remaining easy to punch through. According to verified reviews, Weaver’s cloth works beautifully for finer details but requires more precision.
- Choose patterns with larger areas of solid color rather than intricate details
- Start with worsted weight wool yarn or embroidery floss for consistent results
- Use a Morgan lap stand or gripper strip frame to maintain proper fabric tension
- Practice your punching rhythm on scrap fabric before beginning your actual project
- Work in good lighting to clearly see your punch holes and maintain even spacing
Remember that punch needle creates texture through repetition and rhythm. Don’t worry if your first few loops look uneven – this craft rewards patience and practice. Most buyers report that their technique improves dramatically after completing just one small project.
Simple Geometric Coaster
A geometric coaster makes the perfect first punch needle project because it combines simple shapes with practical functionality. This pattern typically measures 4 inches square and features basic geometric elements like triangles, circles, or parallel lines that help you practice consistent loop formation.
Design your coaster using two to three contrasting colors to create visual interest without complexity. A classic approach involves a central circle in one color surrounded by radiating triangles in alternating colors. This design teaches you to work curves and straight lines while creating clean color transitions.
- Transfer your geometric design onto monks cloth using a fabric marker
- Begin punching from the center outward to maintain even tension
- Use a consistent punch depth of about 1/8 inch for uniform loops
- Complete one color section entirely before switching yarns
- Work border elements last to frame your design cleanly
This project typically requires 2-3 hours to complete and uses approximately 15 yards of yarn total. The finished coaster provides immediate satisfaction while teaching fundamental techniques you’ll use in every future project. Consider making a set of four using the same design in different color combinations.
Rainbow Wall Hanging
A rainbow wall hanging offers wonderful practice with color transitions while creating a cheerful decoration for any room. This pattern typically measures 6 by 8 inches and features horizontal rainbow stripes that flow seamlessly into each other, teaching you to blend colors naturally.
The beauty of this design lies in its flexibility – you can create traditional rainbow order (red, orange, yellow, green, blue, indigo, violet) or choose your own color palette. Many crafters report success with sunset colors (pink, orange, yellow) or ocean tones (blue, teal, seafoam green) for a more subdued look.
Start by sketching gentle curved lines across your fabric to create natural-looking color bands. Unlike rigid horizontal stripes, these flowing curves mimic how colors blend in actual rainbows. Plan for each color band to be roughly 1 to 1.5 inches wide, allowing enough space to establish each hue clearly.
- Begin punching with your lightest color to establish clean edges
- Overlap adjacent colors slightly at their borders for smooth transitions
- Vary your punch density within each band for organic texture
- Add small cloud shapes in white or cream at the rainbow’s ends
- Consider metallic gold thread for subtle sparkle accents
This project builds confidence with color work while producing a gift-worthy piece. The flowing design forgives small irregularities in punching, making it ideal for developing your technique. Plan for 4-5 hours of work time and approximately 30 yards of yarn across all colors.
Floral Pillow Cover
A simple floral pillow cover introduces organic shapes and natural color combinations while creating something truly useful for your home. This pattern works beautifully as a 12-inch square cover featuring a large central flower with basic leaves and minimal background detail.
Choose a single flower type for your first attempt – daisies, sunflowers, or simple roses work exceptionally well. The key is selecting a flower with clearly defined petals and a distinct center, avoiding overly complex blooms with intricate details. A sunflower offers perfect beginner appeal with its large yellow petals surrounding a dark brown center.
Plan your color palette around three to four colors maximum: flower petals, flower center, leaves, and background. This limitation keeps your project manageable while still creating visual impact. According to pattern designers, warm yellow petals with a chocolate brown center and sage green leaves on a cream background creates timeless appeal.
- Sketch your flower design to fill roughly 70% of your fabric square
- Start punching the flower center to establish your focal point
- Work petals individually, completing each one fully before moving to the next
- Add leaves and stems using consistent directional punching
- Fill background areas with gentle, even punching for subtle texture
This project teaches you to work with curved shapes and natural forms while creating dimensional effects through pile direction. The finished cover slips easily over a standard pillow insert and adds handmade warmth to any room. Expect to invest 6-8 hours across several sessions, using approximately 45 yards of yarn total. For more guidance, The Spruce Crafts provides expert resources on craft tutorials.

- [20 Acrylic Yarn for crocheting Balls] – Approx. 22 yards ( 0.35oz.) per skein –
- Crochet yarn – 20 different colors in one yarn pack. Perfect variety of rainbow
- Make the most of it with this rainbow yarn – different colors and most common on
Abstract Art Piece
Abstract punch needle art liberates you from precise representation, allowing creative expression through color, texture, and intuitive design. This approach particularly appeals to beginners who worry about making realistic depictions, as abstract work celebrates happy accidents and personal interpretation.
Create your abstract piece on an 8 by 10-inch foundation, giving you enough space for bold gestures without overwhelming detail. Think in terms of color relationships and texture contrasts rather than specific objects. Many successful abstract pieces combine smooth areas of solid color with highly textured sections created through varied punching techniques.
Consider these abstract approaches for your first piece: flowing organic shapes that suggest landscapes or seascapes, geometric blocks in complementary colors, or radiating patterns that create movement and energy. The Smithsonian’s collection of folk art textiles provides wonderful inspiration for abstract designs that feel both modern and timeless.
- Start with a limited color palette of 3-5 colors that work harmoniously together
- Vary your punching height to create areas of different texture and visual weight
- Leave some areas of fabric visible for breathing space and contrast
- Work intuitively, allowing your design to evolve as you punch
- Step back frequently to assess your composition and color balance
Abstract work teaches you to trust your instincts and embrace the meditative quality of punch needle. Without predetermined rules, you discover how different yarns behave and how colors interact in unexpected ways. This freedom often leads to breakthrough moments in technique and personal style development.
Monogram Design
Personal monograms make meaningful gifts while providing excellent practice with letter forms and negative space. A single initial centered on a 6-inch square creates an elegant design suitable for framing, pillow covers, or bag decoration.
Choose a simple, bold letter style for your first monogram – serif fonts like Times Roman or classic sans-serif styles work beautifully in punch needle. Avoid script or ornate fonts that require intricate curves and fine details. Your letter should fill approximately 60% of your fabric space, leaving adequate border area for visual balance.
Consider the relationship between letter and background when planning colors. A dark letter on light background creates classic elegance, while light letters on dark backgrounds feel more contemporary. Adding a simple border or corner flourishes can elevate your monogram without adding complexity.
- Transfer your letter design using carbon paper or light box for accuracy
- Punch the letter outline first to establish clean edges
- Fill the letter interior with consistent directional punching
- Work any border elements before filling the background
- Complete background areas with systematic punching for even coverage
This project develops precision in following drawn lines while teaching you to manage larger areas of solid color. The personal nature of monograms makes them particularly satisfying to complete and cherish. Plan for 3-4 hours of work time using approximately 25 yards of yarn depending on your chosen colors and design elements.
Simple Landscape
A basic landscape scene introduces you to creating depth and atmosphere through color and texture choices. This pattern works well as a 7 by 9-inch horizontal design featuring simple elements like rolling hills, a basic tree, and open sky – avoiding complex details that might frustrate beginning punchers.
Structure your landscape using the classic rule of thirds: sky occupying the upper third, middle ground with hills or trees filling the center third, and foreground elements in the lower section. This composition creates natural balance and guides the viewer’s eye through your scene.
Keep your color palette earth-toned and naturalistic for your first landscape attempt. Sky blues transitioning to lighter blue or white at the horizon, various greens for vegetation, and brown or tan for earth elements create harmony without requiring advanced color theory knowledge. Reviews indicate that beginners find success with just 5-6 colors total.
- Start punching the sky area to establish your lightest values
- Work from background to foreground, layering elements naturally
- Use horizontal punching for sky areas and vertical for tree trunks
- Vary your punching density to suggest distance and atmosphere
- Add texture interest with slightly different green tones for vegetation
Landscape work teaches you about value relationships and how texture direction affects visual perception. The forgiving nature of simplified landscape elements allows experimentation with technique while creating pleasing, displayable art. This project typically requires 5-6 hours of focused work and uses approximately 40 yards of yarn across all colors.
Holiday Ornament
Small holiday ornaments provide quick gratification while building your punch needle skills for future larger projects. These miniature masterpieces typically measure 3 to 4 inches and focus on simple, recognizable holiday symbols like stars, trees, or candy canes.
A Christmas tree ornament offers excellent beginner appeal with its triangular shape and opportunities for color variation. Design your tree as a simple triangle with a small trunk, using traditional Christmas green for the main body with optional colorful ornament dots or garland lines for added interest.
Consider seasonal variations throughout the year: spring flowers, summer suns, autumn leaves, or winter snowflakes. This approach keeps your punch needle practice engaging while building a collection of handmade decorations. Many crafters report that holiday ornaments make perfect gifts when grouped in sets of three or four.
- Create your ornament design on fabric with extra border for finishing
- Complete all punching before cutting your piece from the larger fabric
- Back your finished ornament with felt for stability and professional appearance
- Add hanging loops using coordinating ribbon or yarn
- Consider metallic threads for subtle sparkle and holiday magic
These small projects perfect your technique without major time commitment, typically requiring just 1-2 hours each. The immediate success builds confidence for tackling larger designs while creating meaningful handmade gifts. Use approximately 10 yards of yarn per ornament, making them economical practice pieces as well.
- Adjustable punch needle
- Monks cloth + hoop
- Yarn assortment included
Plant Motif Mug Rug
A plant-themed mug rug combines functionality with natural beauty, creating a coaster-placemat hybrid that protects surfaces while adding handmade charm to your coffee or tea ritual. This project typically measures 5 by 7 inches, providing ample space for a mug and small treat.
Choose simple plant forms for your first attempt – a potted succulent, single leaf, or small flowering branch work beautifully without requiring botanical accuracy. A monstera leaf offers particularly appealing geometry with its distinctive splits and holes, while a simple fern frond provides practice with repetitive shapes and natural curves.
Design your plant motif to occupy roughly half your mug rug space, leaving adequate plain area for practical use. This balance ensures your finished piece functions properly while showcasing your punch needle artistry. Consider the mug rug’s orientation – will it be used horizontally or vertically? – when planning your plant placement.
- Use realistic plant colors or experiment with stylized palettes for modern appeal
- Punch plant stems and main veins first to establish structure
- Fill leaf areas with consistent directional punching following natural growth patterns
- Add subtle shading with slightly darker green tones for depth
- Keep background areas simple to highlight your plant motif
This project bridges decorative and functional punch needle work, teaching you to consider both aesthetics and practicality in your designs. The finished mug rug adds personal style to daily routines while demonstrating your growing skills. Plan for 3-4 hours of work time using approximately 20 yards of yarn total.
Free Resources for More Patterns
Once you’ve completed several beginner projects, you’ll naturally want to expand your pattern library and explore new design possibilities. Fortunately, the punch needle community offers generous sharing of ideas, techniques, and inspiration to fuel your creative journey.
Start by creating your own simple patterns using basic shapes and motifs from everyday life. Sketch ideas in a dedicated notebook, noting color combinations and size specifications for future reference. Many successful punch needle artists began by adapting coloring book designs, embroidery patterns, or even children’s drawings into punch needle projects.
Consider these approaches for developing original patterns: photograph interesting textures, shapes, or color combinations in nature; collect fabric scraps or paint chips that inspire specific color palettes; sketch simple versions of complex images you admire; adapt traditional quilt block designs for punch needle interpretation.
- Practice scaling designs up or down to fit different project sizes
- Experiment with mirror images and repeated motifs for pattern interest
- Keep a color journal documenting successful combinations for future use
- Photograph your completed projects to track technique development over time
- Join online punch needle communities for inspiration and technique sharing
Remember that the best patterns often come from personal interests and meaningful subjects. Your own photographs, favorite quotes, family symbols, or cherished memories can inspire unique designs that no commercial pattern could provide. This personal connection often motivates completion of challenging projects.
For structured learning, consider our comprehensive guide on punch needle for beginners which covers fundamental techniques and project planning. Additionally, our best punch needle kits for beginners review can help you upgrade your tools as your skills develop.
Frequently Asked Questions
How long does it take to complete an easy punch needle pattern?
Most easy punch needle patterns require 2-6 hours depending on size and complexity. Small projects like coasters or ornaments typically take 1-2 hours, while larger pieces like pillow covers or wall hangings need 4-8 hours across several sessions. Your punching speed will increase with practice, making subsequent projects faster to complete.
What’s the best fabric for beginner punch needle patterns?
Monks cloth with 12-count weave provides the ideal foundation for beginning punch needle work. This fabric offers enough structure to hold loops securely while remaining easy to punch through consistently. According to verified reviews, most beginners find monks cloth forgiving of technique variations while producing professional-looking results. Our fabric guide covers additional options as your skills develop.
How much yarn do I need for a typical beginner project?
Yarn requirements vary significantly based on project size and punch density. Small coasters use approximately 10-15 yards total, while 8×10 inch wall hangings require 35-50 yards across all colors. Always purchase 25% more yarn than calculated to account for learning curves and potential mistakes. Most beginners find that worsted weight wool yarn provides consistent results and forgiving handling properties.
Can I use regular embroidery floss for punch needle patterns?
Yes, embroidery floss works beautifully for fine detailed work, especially when using smaller punch needle sizes like the Oxford #10. However, beginners often find wool yarn easier to handle and more forgiving of tension variations. If using embroidery floss, separate the strands and use 2-3 strands together for adequate coverage while maintaining easy punching action.
Do I need a frame for punch needle work?
While not absolutely necessary for small projects, a frame or hoop significantly improves results by maintaining consistent fabric tension. Morgan lap stands and gripper strip frames receive excellent reviews from beginners for their stability and ease of use. Proper tension prevents puckering and ensures even loop formation throughout your project.
How do I fix mistakes in my punch needle work?
Most punch needle mistakes are easily correctable. Simply pull the yarn back through the fabric from the front, removing unwanted loops. Re-punch the area with more attention to spacing and direction. Unlike other needlework, punch needle allows extensive reworking without damaging the fabric or showing previous attempts.
Starting with easy punch needle patterns builds the foundation for a lifetime of creative expression and relaxing handwork. Each completed project teaches valuable lessons about color, texture, and technique while providing the satisfaction of creating something beautiful with your own hands. Remember that every expert punch needle artist once struggled with their first few loops – embrace the learning process and enjoy each step of your creative journey. For additional guidance on comparing techniques, explore our article on punch needle vs rug hooking to understand how this craft fits within the broader world of fiber arts.
Frequently Asked Questions
What supplies do I need to start punch needle as a complete beginner?
You’ll need a punch needle (the Ultra Punch is recommended for beginners), monks cloth with a 12-count weave, and worsted weight wool yarn or embroidery floss. These basic supplies will give you everything needed to complete your first easy punch needle patterns without requiring a large investment.
Is punch needle difficult to learn for seniors with limited crafting experience?
No, punch needle is very beginner-friendly when you start with the right approach. Beginning with simple shapes and basic techniques builds your confidence with each completed project, making it an accessible hobby for seniors looking to try something new.
What makes a punch needle pattern suitable for first-time projects?
The best beginner patterns feature larger areas of solid color rather than intricate details, allowing you to focus on mastering the basic punching technique. These simple designs help you understand proper preparation and develop realistic expectations for your skill level without overwhelming frustration.
What’s the difference between punch needle types and which should I choose as a beginner?
The Ultra Punch needle offers adjustable pile height and works well for beginners due to its versatility, while the Oxford Punch Needle creates delicate work perfect for detailed patterns. Reviews show newcomers typically prefer the Ultra Punch for its ease of use, though you can choose based on your comfort level and budget.